conair hand steamer instructions

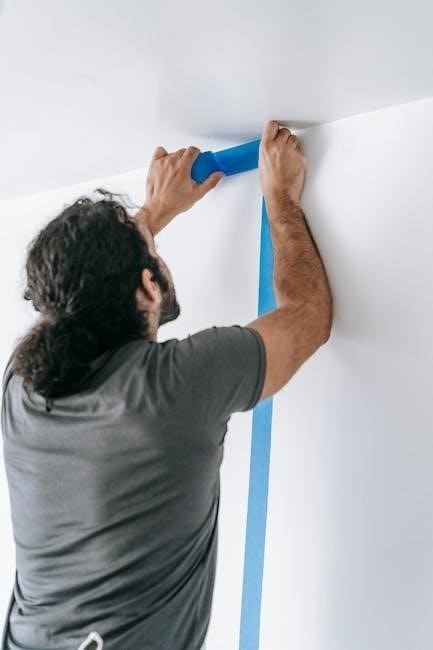
The Conair Hand Steamer is a portable‚ efficient‚ and easy-to-use tool for removing wrinkles and freshening fabrics. Designed for home and travel‚ it offers multiple steam settings‚ automatic shut-off‚ and various attachments for versatile fabric care.

Understanding the Conair Hand Steamer Components

The Conair Hand Steamer includes a water reservoir‚ steam head‚ and various attachments like fabric brushes. Its compact design ensures portability and ease of use for effective fabric care.

Overview of the Steamer Parts

The Conair Hand Steamer is designed with a range of essential components to ensure efficient fabric care. The primary parts include a water reservoir‚ steam head‚ and handles for easy maneuverability. The water reservoir is detachable‚ making it simple to fill and clean. The steam head features steam vents that distribute hot vapor evenly‚ while the ergonomic handle provides a comfortable grip during use. Additional components like fabric brushes and cushion brushes are included to cater to different fabric types‚ ensuring gentle yet effective steaming. The steamer also includes a power cord and control buttons for adjusting steam settings. These components work together to deliver a seamless steaming experience‚ making it easy to remove wrinkles and freshen fabrics. The design emphasizes portability and user-friendliness‚ with a compact structure that allows for convenient storage and travel. Each part is designed to enhance performance and durability‚ ensuring long-term satisfaction for users.

Accessories and Attachments

The Conair Hand Steamer comes with a variety of accessories and attachments designed to enhance your fabric care experience. Key accessories include a removable fabric/lint brush and a soft cushion brush‚ which are ideal for delicate fabrics like silk and chiffon. These brushes help smooth fabrics and prevent direct contact with the steam head‚ reducing the risk of damage. Additional attachments‚ such as a fabric brush‚ are provided for heavier materials like wool and velvet‚ ensuring effective wrinkle removal. The steamer also includes a convenient travel pouch for easy storage and portability. These accessories are designed to work seamlessly with the steamer‚ offering versatility for different fabric types and garment care needs. By using the appropriate attachment for your fabric‚ you can achieve professional-level results while protecting your garments from heat and moisture. The included accessories make the Conair Hand Steamer a comprehensive tool for maintaining your wardrobe at home or on the go.

Preparation Steps Before Using the Conair Hand Steamer

Fill the water reservoir with distilled water‚ ensuring not to overfill‚ and attach the desired accessories or brushes before use for optimal performance and fabric care.

Filling the Water Reservoir

Filling the water reservoir of your Conair Hand Steamer is a simple process that ensures optimal performance. First‚ unplug the steamer to avoid any accidental start-up. Place the unit on a stable‚ flat surface and locate the water tank release lever‚ typically found near the base. Hold the reservoir with one hand and move the release lever toward the power cord to detach it. Carefully fill the reservoir with distilled water‚ making sure not to exceed the maximum fill level indicated on the tank. Avoid using tap water‚ as it may contain minerals that can cause scaling and reduce the steamer’s efficiency. Once filled‚ reattach the reservoir securely‚ ensuring it clicks into place to prevent leaks during use. Properly filling the reservoir is essential for maintaining consistent steam output and extending the life of your steamer.

Attaching Accessories and Brushes

Attaching accessories and brushes to your Conair Hand Steamer is a straightforward process designed to enhance your steaming experience. To begin‚ ensure the steamer is unplugged and cool to avoid any accidental start-up. Hold the steamer firmly with one hand and align the desired accessory or brush with the attachment port‚ typically located at the steam head. Gently push and twist the accessory until it clicks securely into place. For the soft cushion brush‚ simply slide it over the steam head until it fits snugly. Always use the provided attachments to prevent damage to the steamer. Before use‚ test the accessory on an inconspicuous fabric area to ensure compatibility and safety. Properly attached accessories ensure optimal results when steaming different fabrics and garment types‚ making the process more efficient and effective.

Operating the Conair Hand Steamer

Plug in the steamer‚ turn it on‚ and wait for the steam button to turn green‚ indicating it’s ready. Adjust steam settings as needed for optimal results on various fabrics.

Plugging in and Turning On the Steamer

To begin using the Conair Hand Steamer‚ locate a grounded electrical outlet and plug in the device. Ensure the steamer is placed on a stable‚ heat-resistant surface. Once plugged in‚ turn on the steamer by pressing the power button. The steam button will light up‚ indicating the unit is heating up. Allow the steamer to preheat for about 35 seconds until the steam button turns green‚ signaling it is ready for use. During this time‚ prepare your garment by hanging it on a padded hanger or laying it flat on an ironing board. For optimal results‚ brush the fabric lightly with the included soft cushion brush to ensure smooth steam distribution. Always use the correct voltage and avoid using damaged cords to ensure safe operation. Once the steamer is ready‚ you can adjust the steam settings based on the fabric type for efficient wrinkle removal.

Heating Up the Steamer

Once plugged in and turned on‚ the Conair Hand Steamer begins its heating process. Allow approximately 35 seconds for the steamer to heat up fully. You will know it is ready when the steam button turns green. During this time‚ ensure the water reservoir is filled with distilled water‚ as tap water can cause mineral buildup. Do not overfill the reservoir‚ as this may block steam vents and reduce performance. While waiting for the steamer to heat‚ prepare your garment by hanging it on a padded hanger or laying it flat on an ironing board. Brush the fabric lightly with the included soft cushion brush to ensure smooth steam distribution. Always place the steamer on a stable‚ heat-resistant surface and avoid leaving it unattended during heating. Once the green light appears‚ the steamer is ready for use‚ and you can adjust the steam settings based on the fabric type for optimal results.

Adjusting Steam Settings

Adjusting the steam settings on your Conair Hand Steamer ensures optimal results for different fabrics. Start by plugging in the steamer and turning it on. Once heated‚ use the steam control button to select the desired setting. For delicate fabrics like silk‚ chiffon‚ or lace‚ choose the lowest steam setting to prevent damage. Medium settings are ideal for cotton‚ linen‚ and rayon‚ while heavier fabrics like wool and velvet require higher steam levels. Always test the fabric’s tolerance by applying steam to an inconspicuous area first. Properly adjusting the steam ensures efficient wrinkle removal while protecting your garments from excessive heat or moisture. Match the steam level to the fabric type and thickness for the best results. This feature makes the Conair Hand Steamer versatile and safe for all fabric types‚ ensuring professional-looking garments with minimal effort.

Using the Steamer on Different Fabrics

Using the Conair Hand Steamer on different fabrics requires careful consideration to ensure safe and effective results. Start by testing the fabric’s tolerance to steam on an inconspicuous area. For delicate fabrics like silk‚ chiffon‚ or lace‚ use the lowest steam setting and maintain a distance of about 6 inches to avoid damage. Cotton‚ linen‚ and rayon can handle medium steam levels‚ while heavier fabrics like wool and velvet require higher settings. Always use the soft cushion brush attachment for delicate items to protect them from direct steam contact. For smoother results‚ hang garments on a padded hanger and fill out areas like shoulders and sleeves with folded towels. Move the steamer slowly and steadily‚ keeping it upright to prevent water spots. Avoid steaming zippers‚ buttons‚ or sensitive trims. By adjusting the steam settings and techniques according to fabric type‚ you can achieve professional-looking results while preserving your garments.

Safety Precautions When Using the Conair Hand Steamer

Always unplug the steamer before cleaning or when not in use. Avoid touching hot surfaces and keep it away from children. Use distilled water to prevent mineral buildup and ensure safe operation.

General Safety Guidelines

To ensure safe and effective use of the Conair Hand Steamer‚ follow these essential guidelines:

  • Always unplug the steamer before cleaning‚ storing‚ or when not in use to prevent electrical accidents.
  • Keep the steamer out of reach of children and pets to avoid unintended operation or burns.
  • Avoid touching the steam plate or hot surfaces during operation‚ as they can cause burns.
  • Use distilled water only to prevent mineral buildup and maintain performance.
  • Place the steamer on a stable‚ heat-resistant surface to avoid tipping or damage.
  • Never operate the steamer near flammable materials or in damp environments.
  • Test fabrics with low steam settings first to ensure compatibility and avoid damage.

By adhering to these guidelines‚ you can safely enjoy the benefits of your Conair Hand Steamer while maintaining its efficiency and longevity.

Safety During Operation

Ensure a safe experience while using your Conair Hand Steamer by following these operational safety tips:

  • Always maintain a safe distance from the steam outlet to avoid burns or scalding.
  • Never direct the steam towards your face‚ eyes‚ or skin.
  • Keep the steamer upright and avoid tilting it excessively‚ as this can cause hot water to spill.
  • Do not leave the steamer unattended while it is in operation.
  • Ensure fabrics are hung securely on a hanger or drying rack to prevent them from coming into contact with the steam plate.
  • Avoid using the steamer in areas with poor ventilation or near open flames.
  • Always test steam settings on an inconspicuous area of the fabric before full use.

By following these operational safety guidelines‚ you can protect yourself and others while effectively steaming your garments.

Alright‚ so I’m trying to figure out how to write the text for the subheading ‘

Electrical Safety Tips

‘ under the topic ‘conair hand steamer instructions’. The user has given me a bunch of information from the internet‚ and I need to make sure I use that to create the text; First off‚ I need to ensure that I don’t include any information that’s going to be in other subheadings. That means I should focus solely on electrical safety tips without overlapping with other safety topics like general precautions or operational safety.
Alright‚ looking at the information provided‚ I see there are specific points about electrical safety. For example‚ one of the points mentions unplugging the steamer before cleaning or when not in use to avoid electric shock. Another point talks about using the steamer with a grounded electrical outlet. There’s also advice about not using damaged cords or plugs‚ as they can cause electric shocks. Additionally‚ it’s mentioned that the steamer should be kept away from water and not used in damp environments. There’s a note about not overloading the outlet with multiple high-power devices. Also‚ if the steamer malfunctions‚ it should be stopped immediately‚ and customer support should be contacted. There’s a reminder to follow recommended voltage and wattage specifications. Regular inspection of the power cord for signs of wear or damage is also important. Proper storage in a cool‚ dry place after the steamer has cooled down is advised to prevent any electrical issues.

Let me organize these points:

Always unplug the steamer before cleaning or when not in use to prevent electric shock.
Use the steamer with a grounded electrical outlet to ensure safety.
Avoid using damaged cords or plugs‚ as they can cause electric shock;
Keep the steamer away from water and damp environments to prevent electrical hazards.
Do not overload the outlet with multiple high-power devices.
If the steamer malfunctions‚ stop use immediately and contact customer support.
Follow the recommended voltage and wattage specifications.
Regularly inspect the power cord for signs of wear or damage.
Store the steamer in a cool‚ dry place after it has cooled down completely.

Now‚ I need to translate these points into a smooth‚ natural-sounding paragraph that includes all these tips without exceeding the word limit. I should also ensure that each tip is clearly presented and easy to understand.

Let me start drafting:

“Always unplug the Conair Hand Steamer before cleaning or when not in use to prevent electric shock. Use it with a grounded electrical outlet for added safety. Never use damaged cords or plugs‚ as they can cause electric shocks. Keep the steamer away from water and damp environments to avoid electrical hazards. Do not overload the outlet with multiple high-power devices. If the steamer malfunctions‚ stop use immediately and contact customer support. Ensure to follow the recommended voltage and wattage specifications. Regularly inspect the power cord for any signs of wear or damage. Store the steamer in a cool‚ dry place after it has cooled down completely to maintain electrical safety.”

Hmm‚ that’s a bit too choppy. Let me try integrating them more smoothly:

“Always unplug the Conair Hand Steamer before cleaning or when not in use to prevent electric shock. Ensure it is used with a grounded electrical outlet for enhanced safety. Avoid using damaged cords or plugs‚ as they can lead to electric shocks. Keep the steamer away from water and damp environments to minimize electrical risks. Do not overload the outlet with multiple high-power devices. If the steamer malfunctions‚ discontinue use immediately and contact customer support. Adhere to the recommended voltage and wattage specifications. Regularly inspect the power cord for wear or damage. Store the steamer in a cool‚ dry place after it has fully cooled down to uphold electrical safety.”

That’s better. Now‚ I’ll need to check the word count to make sure it’s around . Let me count:

Always
unplug
the
Conair
Hand
Steamer
before
cleaning
or

when
not
in
use
to
prevent
electric
shock
Ensure
it
is
used
with
a
grounded
electrical
outlet
for
enhanced
safety
Avoid
using
damaged
cords
or
plugs
as
they
can
lead
to
electric
shocks
Keep
the
steamer
away
from
water
and
damp
environments
to
minimize
electrical
risks
Do
not
overload
the
outlet
with
multiple
high-power
devices
If
the
steamer
malfunctions
discontinue
use
immediately
and
contact
customer
support
Adhere
to
the
recommended
voltage
and
wattage
specifications
Regularly
inspect
the
power
cord
for
wear
or
damage
Store
the
steamer
in

a
cool
dry
100. place
101. after
102. it
103. has
104. fully
105. cooled
106. down

107. to
108. uphold
109. electrical
110. safety

That’s . I need to reach 148‚ so I need to add more details or elaborate on some points without introducing new information. Maybe adding explanations or emphasizing certain points.

Let’s try expanding a bit:

“Always unplug the Conair Hand Steamer before cleaning or when not in use to prevent electric shock. This simple step ensures that no accidental start-ups occur‚ keeping you and others safe. Ensure it is used with a grounded electrical outlet for enhanced safety‚ as this provides better protection against electrical hazards. Avoid using damaged cords or plugs‚ as they can lead to electric shocks or even fires. Keep the steamer away from water and damp environments to minimize the risk of electrical accidents. Do not overload the outlet with multiple high-power devices‚ as this can cause circuit overloads or fires. If the steamer malfunctions‚ discontinue use immediately and contact customer support to avoid any potential dangers. Adhere to the recommended voltage and wattage specifications to ensure the steamer operates safely and efficiently. Regularly inspect the power cord for any signs of wear‚such as fraying or cuts‚ and replace it if necessary. Store the steamer in a cool‚ dry place after it has fully cooled down to uphold electrical safety and prevent any moisture-related issues.”

Now‚ let’s count the words:

Always
unplug
the
Conair
Hand
Steamer
before
cleaning
or
when
not
in
use
to
prevent
electric
shock
This
simple
step
ensures
that
no
accidental
start-ups
occur‚
keeping
you
and
others
safe
Ensure
it
is
used
with
a
grounded
electrical
outlet
for
enhanced
safety‚
as
this
provides
better
protection
against
electrical
hazards
Avoid
using
damaged
cords
or
plugs‚
as
they
can
lead
to
electric
shocks
or
even
fires
Keep

the
steamer
away
from
water
and
damp
environments

to
minimize
the
risk
of
electrical
accidents
Do
not
overload
the
outlet
with
multiple
high-power
devices‚
as
this
can
cause
circuit
overloads
or
100. fires
101. If
102. the
103. steamer
104. malfunctions‚
105. discontinue
106. use
107. immediately
108. and
109. contact

110

Maintenance and Care for the Conair Hand Steamer

Regularly clean the Conair Hand Steamer with a damp cloth and avoid harsh chemicals. Ensure it cools down completely before storing to prevent moisture buildup. Use distilled water to prevent mineral buildup and empty the reservoir during storage to avoid bacterial growth. Store the steamer in a cool‚ dry place to maintain its efficiency and longevity.

Cleaning the Steamer

Regular cleaning is essential to maintain the performance and longevity of your Conair Hand Steamer. Always unplug the unit before cleaning to avoid electric shock. Use a soft‚ damp cloth to wipe down the exterior and interior surfaces‚ paying attention to areas around the steam vents and reservoir. Avoid using harsh chemicals or abrasive cleaners‚ as they may damage the device. For tougher mineral buildup‚ mix equal parts water and white vinegar in the reservoir‚ let it stand for a few minutes‚ then rinse thoroughly. Never submerge the steamer in water or use excessive moisture‚ as this can damage electrical components. After cleaning‚ ensure all parts are completely dry before storing. Regular maintenance helps prevent clogging and ensures optimal steam efficiency. By following these steps‚ you can keep your Conair Hand Steamer in excellent condition and extend its lifespan.

Descaling the Steamer

Descaling your Conair Hand Steamer is crucial to remove mineral buildup from tap water‚ which can reduce performance over time. To descale‚ mix equal parts water and white vinegar in the reservoir. Let the solution stand for 5-10 minutes to soften deposits. Turn on the steamer and allow the vinegar mixture to flow through the system. Repeat this process until the reservoir is empty. Rinse thoroughly by filling the reservoir with clean water and running it through the steamer. For tougher buildup‚ repeat the process as needed. Regular descaling every 2-3 months ensures optimal steam flow and prevents clogging. Always unplug the steamer before descaling to ensure safety. This maintenance routine helps extend the lifespan of your Conair Hand Steamer and maintains its efficiency in removing wrinkles and freshening fabrics.

Storing the Steamer

Proper storage of your Conair Hand Steamer is essential to maintain its performance and longevity. After use‚ allow the steamer to cool down completely to prevent moisture buildup. Empty the water reservoir to avoid mineral deposits and bacterial growth. Store the steamer in a cool‚ dry place‚ away from direct sunlight and heat sources. Use the original packaging or a protective case to shield it from dust and physical damage. Keep all accessories‚ such as brushes and attachments‚ in a separate compartment to maintain organization. Before storing‚ ensure all parts are completely dry to prevent rust or mold. Regularly check the steamer for any residual moisture before placing it in storage. By following these steps‚ you can ensure your Conair Hand Steamer remains in excellent condition and is ready for future use whenever you need it.

Troubleshooting Common Issues

Common issues with the Conair Hand Steamer include low steam flow‚ mineral buildup‚ or clogged steam vents. To address low steam flow‚ ensure the water reservoir is filled correctly and not overfilled‚ as excess water can block steam vents. For mineral buildup‚ descale the steamer every 2-3 months using a vinegar and water solution. If steam vents are clogged‚ use a small toothbrush to gently remove debris. If the steamer does not turn on‚ check the power cord and electrical connections. Regular maintenance‚ such as cleaning and descaling‚ can prevent many of these issues. Always unplug the unit before troubleshooting to ensure safety. If problems persist‚ refer to the user manual or contact Conair customer support for assistance. Proper care and timely troubleshooting will extend the life of your steamer and ensure efficient performance.

The Conair Hand Steamer is a practical and efficient tool for garment care‚ offering ease of use‚ multiple steam settings‚ and safety features for optimal results. Its portability and lightweight design make it ideal for both home and travel‚ ensuring wrinkles can be removed wherever you go. By following the provided instructions‚ users can achieve professional-looking results effortlessly. Regular maintenance‚ such as cleaning and descaling‚ will extend the product’s lifespan and ensure consistent performance. Always use distilled water to prevent mineral buildup and test fabrics with the lowest steam setting first to ensure compatibility. Proper storage and safety precautions will further enhance your experience. With its user-friendly interface and quick heat-up time‚ the Conair Hand Steamer is a valuable addition to any household‚ providing a convenient alternative to traditional ironing and keeping your clothes looking fresh and wrinkle-free.

brother d210 manual

The Brother D210 manual is an essential guide for operating the P-Touch PT-D210 label maker. It covers initial setup, text entry, label customization, and troubleshooting. The manual also provides details on compatible TZe tapes and energy-saving features. Available in PDF format, it ensures optimal use of the device.

1.1 Importance of the Manual for Brother D210 Users

The Brother D210 manual is a crucial resource for users to maximize the functionality of their label maker. It provides step-by-step guidance for initial setup, troubleshooting, and advanced features. By following the manual, users can ensure proper installation, optimize label quality, and resolve common issues efficiently. The guide also covers customization options, such as font styling and margin adjustments, enabling users to create professional-looking labels. Additionally, it highlights compatible TZe tapes and maintenance tips to extend the device’s lifespan. Whether you’re a novice or experienced user, the manual serves as an indispensable tool for unlocking the full potential of the Brother D210, ensuring smooth and efficient labeling experiences.

1.2 Overview of the Brother D210 Label Maker

The Brother D210 is a versatile and user-friendly electronic labeling system designed for efficient label creation. It belongs to the P-Touch series, known for its portability and ease of use. This label maker is ideal for both home and office environments, offering a range of features to meet various labeling needs. The device supports multiple font styles, symbols, and emojis, allowing users to customize labels creatively. It uses TZe tapes, which are durable and available in different colors and widths. The Brother D210 is also energy-efficient, with an Eco Mode to conserve power. Its compact design and intuitive interface make it a practical choice for organizing files, folders, and other items. This label maker is a reliable tool for anyone seeking high-quality, customizable labels with minimal effort.

Key Features and Specifications of the Brother D210

The Brother D210 features a user-friendly interface, supports TZe tapes, and offers customizable label options with various fonts and symbols. Its compact design ensures portability and efficiency.

2.1 Core Features of the Brother D210 Label Maker

The Brother D210 label maker offers a range of core features designed to enhance productivity. It includes a QWERTY keyboard for easy text input, a backlit display for clear visibility, and durable construction for long-lasting use. The device supports various label sizes and provides options for font styling, bold text, and underlining. It also allows users to store frequently used labels for quick access. Additionally, the label maker is compatible with a variety of TZe tapes, ensuring high-quality, smudge-resistant labels. These features make it an ideal choice for both personal and professional labeling needs, providing efficiency and versatility.

2.2 Technical Specifications of the Brother D210

The Brother D210 label maker features a high-resolution backlit display for clear visibility. It supports labels up to 12mm in width and uses TZe tapes for durable, water-resistant printing. The device weighs approximately 230g, making it lightweight and portable. It operates on 3 AA batteries or an optional AC adapter, ensuring flexibility in power options. The label maker includes 14 font styles, 10 frame designs, and 426 symbols for enhanced customization. It also supports mirror and vertical printing, adding versatility to label creation. With dimensions of 135mm (W) x 152mm (D) x 54mm (H), the Brother D210 is compact and easy to handle. Its memory stores up to 15 labels, streamlining repetitive tasks for efficient labeling solutions.

Initial Setup and Configuration

Unbox the Brother D210, ensuring all components are included. Insert 3 AA batteries or use the AC adapter for power. Familiarize yourself with the display and keys. Load the TZe tape correctly for initial printing. Follow the manual’s guidance for a seamless setup experience.

3.1 Unboxing and Physical Overview of the Brother D210

Upon unboxing the Brother D210, you’ll find the label maker, a user manual, a cassette for the TZe tape, and a sample tape. The device features a compact, lightweight design with an LCD display for easy navigation. The keyboard includes a QWERTY layout and function keys for quick access to settings. On the top, there’s a tape exit slot and a cutter for trimming labels. The back houses the battery compartment and an optional AC adapter port. The physical buttons include navigation arrows, a label key, and a power button. The cassette compartment is located at the bottom, designed for easy tape replacement. The overall design emphasizes portability and user-friendly operation, making it ideal for both home and office use.

3.2 Connecting the Power and Basic Setup Instructions

To connect the power, insert the AC adapter into the Brother D210 or install 6 AA batteries for portability. Ensure the device is turned off before connecting power. Next, insert the TZe tape cassette by lifting the cassette cover, aligning the cassette, and gently pushing until it clicks. Turn on the device and follow the LCD prompts to select your language, date, and time. Use the navigation arrows to scroll and the OK button to confirm settings. Finally, set your unit of measurement (mm/inch) and save the settings. This completes the basic setup, allowing you to start creating labels. Always refer to the manual for detailed guidance to ensure proper configuration and operation.

Label Creation and Printing

The Brother D210 allows users to create labels by entering text via the QWERTY keyboard and formatting it with bold or italic styles. Preview labels on the LCD before printing to ensure accuracy. Use the navigation keys to adjust settings like font size or alignment. Press the Print key to produce high-quality labels efficiently. This feature makes labeling projects quick and straightforward for various applications.

4.1 Entering Text and Basic Label Creation

Entering text on the Brother D210 is straightforward using its QWERTY keyboard. Type your label content, then use the navigation keys to move the cursor for editing. Press the OK key to confirm. The LCD display previews your text before printing. Use the Format key to adjust font styles, such as bold or underline. Symbols and emojis can also be added for customization. Once satisfied, press the Print key to produce your label. The D210 supports various TZe tapes, ensuring durable and high-quality results. This process makes creating basic labels quick and efficient, ideal for organizing files, cables, or other items. The device’s intuitive design ensures a seamless experience for users of all skill levels.

4.2 Adjusting Label Length and Margins

To adjust the label length and margins on the Brother D210, press the Label key and use the arrow keys to navigate to the Label Length or Margins option. Select your preferred setting and press OK. For label length, choose between Auto or Manual modes. In Manual mode, use the arrow keys to set the desired length. For margins, adjust the left or right margins to ensure proper alignment. Preview your settings on the LCD display before printing. Press the Print key to produce your label. These adjustments ensure your labels are correctly sized and neatly formatted. Proper margin settings also help prevent wasted tape, making the process efficient and cost-effective. This feature is especially useful for creating professional-looking labels for various purposes.

Customization and Advanced Features

The Brother D210 offers extensive customization options, including various font styles, bold, italic, and underline settings. Users can also incorporate symbols and emojis for enhanced label design. These features ensure labels meet specific needs and preferences, making them more visually appealing and professional. The device supports advanced formatting to create unique and tailored labels efficiently.

5.1 Font and Styling Options for Labels

The Brother D210 offers a variety of font styles and styling options to enhance label customization. Users can choose from different font sizes, bold, italic, and underline options. Additionally, the device supports mirror and vertical text alignment, allowing for creative and professional label designs. These features enable users to tailor labels to specific needs, ensuring clarity and visual appeal. The manual provides detailed instructions on how to access and adjust these settings, making it easy to achieve the desired label appearance. With these options, users can create labels that are both functional and aesthetically pleasing, meeting various personal or professional requirements effectively. This ensures a high level of customization and satisfaction with the final output.

5.2 Using Symbols and Emojis in Labels

The Brother D210 allows users to enhance labels by incorporating symbols and emojis, adding a creative touch to their designs. To access these, navigate to the symbols menu using the device’s keypad. The manual provides a comprehensive list of available symbols, including common icons like arrows, stars, and shapes. Emojis can also be added for a more modern and engaging look. These features are particularly useful for creating eye-catching labels for gifts, files, or organizational projects. The process is straightforward, and the manual guides users through each step to ensure seamless integration of these elements. This feature makes the Brother D210 a versatile tool for both practical and decorative labeling needs, offering a way to make labels more expressive and personalized.

Troubleshooting Common Issues

The manual addresses common issues like error messages, print quality problems, and tape jam resolution. It provides step-by-step solutions to ensure smooth operation of the Brother D210.

6.1 Resolving Common Problems with the Brother D210

The Brother D210 manual provides detailed solutions for common issues, such as error messages, poor print quality, and tape jams. Users can resolve these problems by checking power connections, cleaning the print head, or resetting the device. The manual also offers troubleshooting steps for label alignment and margin adjustments. Additionally, it guides users on how to clear paper jams and address ink cartridge issues. For more complex problems, the manual recommends updating firmware or contacting Brother support. By following these steps, users can quickly restore their label maker to optimal functionality and ensure high-quality labels; The manual’s clear instructions make it easy to diagnose and fix issues efficiently.

6.2 Maintenance Tips for the Brother D210

Regular maintenance ensures the Brother D210 operates smoothly. Clean the print head and cutter to prevent residue buildup. Use only genuine Brother TZe tapes to avoid jams. Check power connections and update firmware for optimal performance. Store the device in a dry, cool place to protect internal components. Test labels periodically to ensure quality. Refer to the manual for detailed cleaning instructions and troubleshooting tips to extend the device’s lifespan. Proper care ensures consistent, high-quality labels and prevents common issues. Following these steps helps maintain efficiency and reliability, keeping the Brother D210 in excellent working condition for years.

Compatible Tapes and Accessories

The Brother D210 supports TZe tapes in various sizes and colors for durable, high-quality labels. Additional accessories include USB cables, adapters, and label cassettes.

7.1 Overview of TZe Tapes for the Brother D210

TZe tapes are the primary label cassettes designed for the Brother D210 label maker. Known for their durability and water-resistance, these tapes are laminated to prevent peeling and fading. Available in various sizes and colors, TZe tapes cater to different labeling needs, from standard labels to specialized applications. Their adhesive-backed design ensures secure placement on various surfaces. The tapes are eco-friendly and offer a wide range of options, including standard, acid-free, and even glow-in-the-dark varieties. Brother’s TZe tapes are designed to deliver crisp, long-lasting labels, making them ideal for both indoor and outdoor use. Their compatibility with the D210 ensures seamless performance and high-quality labeling results.

7.2 Other Compatible Accessories

Beyond TZe tapes, the Brother D210 supports a range of compatible accessories to enhance functionality. These include USB cables for connecting to computers, ensuring seamless label design and printing. Power adapters are available for consistent operation, while protective carrying cases help transport the label maker safely. Additional accessories like label holders and stands can improve organization and convenience. Brother also offers extended warranty options for added peace of mind. These accessories are designed to maximize the efficiency and versatility of the D210, catering to both home and professional environments. They ensure users can maintain, transport, and expand the capabilities of their label maker with ease.

Optimal Usage and Label Quality

Ensure high-quality labels by using genuine TZe tapes and maintaining proper printer settings. Enable Eco Mode for energy efficiency without compromising print quality. Regular maintenance enhances performance and consistency.

8.1 Tips for Achieving High-Quality Labels

To achieve high-quality labels with the Brother D210, use genuine TZe tapes designed for optimal compatibility. Ensure the tape is properly aligned and free from dust. Regularly clean the printer head and maintain proper tension to avoid smudging. Adjust settings like label length and margins precisely for consistent results. Use the Eco Mode for energy efficiency without compromising quality. For best output, update the printer firmware periodically and refer to the manual for advanced customization options. Proper maintenance and adherence to guidelines ensure durable, professional-looking labels every time.

8.2 Eco Mode and Energy Efficiency

The Brother D210 features an Eco Mode that reduces energy consumption during standby and operation, promoting sustainability. Enable Eco Mode to lower power usage without sacrificing performance. The device automatically shuts off after a period of inactivity, further conserving energy. Using genuine TZe tapes ensures optimal compatibility and minimizes waste. Regular firmware updates may also improve energy efficiency. The manual provides detailed guidance on activating Eco Mode and maximizing energy savings. By following these tips, users can reduce their environmental impact while maintaining high-quality label printing. Energy-efficient design makes the Brother D210 a practical choice for eco-conscious users seeking reliable performance.

Downloading and Viewing the Manual

The Brother D210 manual can be downloaded from the official Brother website. It is available in PDF format, requiring Adobe Acrobat Reader for viewing.

9.1 Accessing the Brother D210 Manual in PDF Format

To access the Brother D210 manual, visit the official Brother website and navigate to the support section. Search for the PT-D210 model, and select the manual option. The document will be available in PDF format for free download. Ensure Adobe Acrobat Reader is installed on your device to view the file. Once downloaded, you can save it for future reference or print it for convenience. This manual provides comprehensive guidance on using the label maker effectively.

9.2 Requirements for Viewing the Manual (Adobe Acrobat Reader)

To view the Brother D210 manual, you need Adobe Acrobat Reader installed on your device. This free software allows you to open and read PDF files; Ensure your device meets the system requirements for Acrobat Reader, which supports Windows, macOS, iOS, and Android. Download the latest version from the official Adobe website. After installation, locate the downloaded PDF manual and open it using Acrobat Reader. This software provides tools for zooming, searching, and printing the document. Without Acrobat Reader, you won’t be able to access the manual’s content. Updating the software regularly ensures compatibility and optimal performance when viewing the Brother D210 manual.

FAQs and Technical Support

Brother offers official FAQs, videos, and downloads for the D210. Visit their support page for troubleshooting guides, manuals, and contact options to assist with any inquiries or issues.

10.1 Frequently Asked Questions About the Brother D210

Common questions about the Brother D210 include how to adjust label length and margins, troubleshoot issues like blank labels, and resolve connectivity problems. Users also inquire about compatible TZe tapes and how to customize fonts. Additionally, FAQs cover energy-saving modes, resetting the device, and software updates. These questions are addressed in the manual and online support resources, ensuring users can easily find solutions to common challenges. The manual also provides step-by-step guidance for various operations, making it a comprehensive resource for both new and experienced users. This section helps users optimize their device’s performance and troubleshoot effectively. The Brother D210’s FAQs are designed to enhance user experience.

10.2 Contacting Brother Support for Assistance

For assistance with the Brother D210, users can contact Brother Support through phone, email, or live chat. The official Brother website provides a dedicated support section with FAQs, manuals, and drivers. Users can also download the PDF manual directly from the site, ensuring access to the latest guidance. Additionally, Brother offers community forums where users can ask questions and share experiences. For urgent issues, contacting Brother Support directly is recommended. Ensure to have the device model and serial number ready for efficient assistance. The Brother Support team is available to address technical inquiries, troubleshooting, and maintenance tips, helping users maximize their D210’s performance. Visit the official Brother website for detailed contact information and support resources. This ensures quick resolution to any challenges users may face.

advent guide

Advent is a four-week period of preparation for Christmas, beginning on the fourth Sunday before December 25th. It symbolizes spiritual reflection, hope, and the arrival of Jesus, marked by traditions like candles and daily readings to deepen faith and joy during the season.

1.1. What is Advent?

Advent is a four-week season in the Christian Church calendar, beginning on the fourth Sunday before Christmas and ending on Christmas Eve. It is a time of spiritual preparation, anticipation, and reflection, focusing on the arrival of Jesus Christ. The season emphasizes themes of hope, peace, joy, and love, encouraging believers to ready their hearts for the celebration of Christ’s birth and His second coming.

1.2. The Significance of Advent in the Church Calendar

Advent holds profound significance as a preparatory season in the Church calendar, fostering spiritual reflection and anticipation. It marks the beginning of the liturgical year, guiding believers to renew their faith and focus on the true meaning of Christmas. Through themes of hope, peace, joy, and love, Advent invites individuals to ready their hearts for the birth of Jesus and His second coming, emphasizing spiritual growth and devotion.

1.3. Preparing for Advent: Spiritual and Practical Tips

Preparing for Advent involves spiritual reflection and practical steps. Create an Advent wreath with candles, read daily Scripture, and engage in prayer. Use an Advent calendar to countdown the days. Focus on gratitude, service, and family bonding. Simplify routines to emphasize faith and joy, ensuring a meaningful celebration of Christ’s birth and spiritual renewal during this sacred season.

History and Origins of Advent

Advent originated in the early Church as a period of spiritual preparation for Christmas, dating back to the 4th century. It evolved into a four-week reflection, symbolizing anticipation and renewal, with traditions like the Advent wreath emerging over centuries to enrich its observance.

2.1. The Early Beginnings of Advent in the Church

Advent began in the early Church as a 40-day fasting period before Christmas, mirroring Lent. By the 5th century, it evolved into a four-week preparation focused on repentance and anticipation of Christ’s birth, with roots in European traditions. The early Church emphasized spiritual readiness, laying the groundwork for modern Advent practices that blend reflection, prayer, and joy in expectation of the Savior’s arrival.

2.2. Evolution of Advent Traditions Over the Centuries

Advent traditions have evolved significantly over time, transforming from a 40-day fasting period in the early Church to the four-week celebration we know today. By the Middle Ages, Advent focused on spiritual preparation and included practices like prayer and fasting. The Advent wreath emerged in the 16th century, symbolizing the weeks leading to Christmas. Over the centuries, traditions like calendar countdowns and candlelighting became widespread, blending ancient customs with modern cultural influences to enrich the season’s spiritual and festive atmosphere.

2.3. Cultural Influences on Advent Celebrations

Cultural influences have shaped Advent celebrations, blending traditional practices with local customs. In Europe, Advent wreaths and festive markets are common, while in the Americas, family-oriented traditions like Advent calendars and special foods prevail. Globally, themed calendars and unique local events reflect diverse cultural flavors, enriching the spiritual and festive essence of the season while preserving its core purpose of anticipation and preparation for Christmas.

Advent Traditions and Practices

Advent traditions include lighting candles on wreaths, reading Scripture, and using calendars to count down to Christmas, fostering reflection and joy in preparation for the season.

3.1. The Advent Wreath and Candles

The Advent wreath, typically made of evergreen branches, holds four candles representing the four Sundays of Advent. Each candle symbolizes hope, peace, joy, and love. The third candle, often pink, marks Gaudete Sunday. A fifth white candle, the Christ Candle, is lit on Christmas Eve. Lighting the candles weekly fosters anticipation and reflection, embodying the journey from darkness to light as Christmas approaches.

3.2; Scripture Readings and Reflections

Advent observances often include daily Scripture readings and reflections, focusing on themes of hope, redemption, and Christ’s coming. These readings typically follow the Church’s lectionary, emphasizing Old Testament prophecies and New Testament narratives. Families and congregations engage in devotional practices, using guides or apps to deepen spiritual preparation and foster a connection to the season’s meaning, encouraging mindfulness and prayer throughout the countdown to Christmas.

3.3. Advent Calendars: A Countdown to Christmas

Advent calendars are a beloved tradition, offering a daily countdown to Christmas. Typically starting December 1st, they feature 24 or 25 compartments, each revealing treats, prayers, or activities. From classic designs with Bible verses to themed versions like chocolate or beauty products, these calendars build anticipation and joy, making the season interactive and meaningful for both children and adults, fostering excitement and reflection as Christmas approaches.

Types of Advent Calendars

Advent calendars come in various forms, including traditional, chocolate, and themed options like beauty, wine, or DIY kits, offering unique ways to countdown to Christmas.

4.1. Traditional Advent Calendars

Traditional Advent calendars are simple yet meaningful, often handmade from wood or fabric, with 24 small doors or windows representing each day leading up to Christmas. Originating in 19th-century Germany, they emphasize the spiritual countdown, sometimes including Bible verses or prayers behind each door. Families open one door daily, fostering anticipation and reflection, making them a timeless way to prepare for the holiday season.

4.2. Chocolate Advent Calendars

Chocolate Advent calendars combine the traditional countdown with a sweet treat, offering 24 pieces of chocolate behind numbered doors. Popular brands like Lindt and Cadbury create these, while others feature gourmet or themed options. They blend the excitement of Advent with indulgence, making them a delightful way to celebrate the season for both children and adults. Some calendars even include surprises like toys or skincare samples, adding variety to the tradition.

4.3. Themed Advent Calendars (e.g., Beauty, Wine, DIY)

Themed Advent calendars offer unique experiences tailored to specific interests. Beauty calendars feature skincare, makeup, and fragrances, while wine calendars provide a selection of fine wines. DIY kits allow crafting and creativity, offering materials for handmade projects. These calendars cater to diverse preferences, making Advent a personalized and engaging experience. They blend tradition with modern interests, creating a countdown that aligns with individual passions and hobbies, enhancing the festive spirit in innovative ways.

Spiritual Guidance for Advent

Spiritual guidance for Advent includes daily readings, reflections, and prayers, focusing on hope, peace, joy, and love, to deepen faith and prepare for Christmas.

5.1. Daily Readings and Devotionals

Daily readings and devotionals are essential for spiritual growth during Advent. They focus on themes of hope, peace, joy, and love, guiding individuals to reflect on Scripture and pray meaningfully. Resources like the BibleProject Guide and Blessed Is She offer structured reflections, helping believers connect with the true meaning of Christmas. These devotions foster a deeper understanding of faith and prepare hearts for the coming of Jesus.

5.2. Prayers and Reflections for the Advent Season

Prayers and reflections during Advent help deepen spiritual preparation for Christmas. Weekly themes of hope, peace, joy, and love guide believers in focused prayer. Resources like the BibleProject Guide offer structured reflections, while others provide heartfelt prayers to align hearts with the season’s true meaning. These practices foster a mindful and worshipful journey, emphasizing the significance of Advent in Christian faith and daily life.

5.3. The Four Sundays of Advent: Hope, Peace, Joy, Love

The four Sundays of Advent symbolize the virtues of hope, peace, joy, and love, guiding believers toward spiritual renewal. Each Sunday represents a candle lit on the Advent wreath, embodying the light of Christ. Reflections and readings focus on these themes, fostering a journey from anticipation to celebration. This structured progression enriches the season, encouraging communities to embrace the true spirit of Advent and prepare for Christmas with heartfelt devotion and unity.

Advent in Different Cultures

Advent traditions vary globally, reflecting unique cultural expressions; From European candlelight processions to vibrant Americas celebrations, each culture adds its own flavors, united by the season’s spiritual essence.

6.1. Advent Celebrations in Europe

In Europe, Advent is a cherished tradition filled with unique cultural practices. Germany and Austria celebrate with festive markets, while Italy highlights midnight Mass. Spain and Portugal emphasize family gatherings, and Scandinavia uses candles to symbolize light in winter. Each country adds its own flavor, blending faith, culture, and joy, creating a vibrant tapestry of Advent traditions across the continent.

6.2. Advent Traditions in the Americas

In the Americas, Advent traditions reflect diverse cultural influences. The United States blends church services with family-oriented activities like crafting Advent wreaths. Latin America celebrates with vibrant processions and Nativity scenes, while Canada incorporates festive markets and carol singing. These traditions emphasize unity, faith, and joyful anticipation, blending local customs with universal themes of hope and preparation for Christmas.

6.3. Unique Advent Practices Around the World

Advent celebrations vary globally, reflecting cultural richness. In Germany, wooden Advent calendars are treasured, while Switzerland offers beauty Advent calendars. Croatia hosts festive Zagreb events, blending traditions with modern flair. Torchlight hikes and magic shows in the Tux Valley add enchantment. These unique practices highlight how Advent is a time for cultural expression, faith, and joyful anticipation, united by the shared spirit of preparation for Christmas.

Family-Friendly Advent Activities

Engage your family with DIY Advent calendars, Advent crafts, and games, fostering spiritual growth and festive joy while creating lasting memories together during the season.

7.1. DIY Advent Calendar Projects

Transform Advent into a creative family experience with DIY Advent calendars; Use materials like wood, fabric, or paper to craft numbered doors or pockets. Fill each with activities, prayers, or small treats. This hands-on project fosters anticipation and togetherness, teaching children the true meaning of the season while sparking imagination and joy in preparation for Christmas.

7.2. Advent Crafts and Games for Children

Engage kids with Advent-themed crafts and games, fostering both fun and faith. Activities include making Advent wreaths, decorating candles, or creating paper chains to count the days. Games like “Find the Nativity Figure” or “Advent Bingo” add excitement. These interactive traditions help children anticipate Christmas while learning its spiritual significance in a playful, memorable way that strengthens family bonds and faith.

7.3. Involving the Whole Family in Advent Preparations

Encourage family participation in Advent preparations through shared activities like creating an Advent wreath, planning meals, or organizing charitable acts. Assign tasks to each member, fostering teamwork and spiritual growth. Reading Scripture together and discussing Advent themes strengthens bonds and builds anticipation for Christmas. Involving everyone ensures a meaningful and joyous celebration.

Advent Music and Hymns

Traditional Advent hymns like “O Come, O Come Emmanuel” and “Wait for the Lord” prepare hearts for Christmas, blending rich theology with festive melodies to inspire reflection.

8.1. Traditional Advent Hymns

Traditional Advent hymns, such as “O Come, O Come Emmanuel” and “Wait for the Lord,” are deeply rooted in sacred theology. These timeless songs emphasize the themes of hope, anticipation, and redemption, drawing believers closer to the spiritual essence of the season. Their melodies and lyrics, often centuries old, create a profound sense of connection to the historical and communal celebration of Advent.

8.2. Modern Music for the Advent Season

Modern Advent music blends traditional themes with contemporary styles, offering fresh expressions of faith. Artists like Chris Tomlin and Lauren Daigle create songs that reflect Advent’s hope and anticipation. These compositions, often infused with genres like pop and indie, resonate with younger generations while maintaining the season’s spiritual essence. They complement classic hymns, providing a dynamic soundtrack for reflection, joy, and preparation for Christ’s arrival.

8.3. The Role of Music in Advent Worship

Music plays a central role in Advent worship, fostering a spiritual atmosphere of anticipation and reflection. Hymns and songs, both traditional and modern, guide congregations through themes of hope, peace, joy, and love. They accompany liturgical practices, such as lighting the Advent wreath, and enrich prayer services. Music unites believers, deepening their connection to the season’s meaning and preparing their hearts for the celebration of Christ’s birth.

Advent and Technology

Advent and technology blend seamlessly, offering digital calendars, apps for daily reflections, and online resources to enhance spiritual preparation and community connection during the season.

9.1. Digital Advent Calendars and Apps

Digital Advent calendars and apps have transformed the traditional countdown, offering interactive features and accessibility. Apps like Advent Guide and Fischman Advent provide daily reflections, prayers, and customizable options. They enhance the spiritual journey with reminders, educational content, and social sharing. These tools cater to diverse preferences, from scripture-based studies to themed countdowns, making the Advent experience engaging and convenient in the digital age.

9.2. Online Resources for Advent Devotionals

Online resources offer a wealth of Advent devotionals, featuring daily readings, reflections, and prayers. Websites like BibleProject and Blessed Is She provide scripture-based studies, blending scholarly insights with practical applications. These resources cater to individuals and families, offering customizable plans and inspiring content to deepen faith. They are easily accessible, making it simple to incorporate spiritual growth into daily life during the Advent season.

9.3. Using Social Media to Share Advent Reflections

Social media platforms like Instagram, Facebook, and Twitter offer powerful tools to share Advent reflections. Use hashtags like #AdventReflections or #WaitinginHope to connect with a global community. Post daily devotional insights, scripture passages, or personal experiences. Share images of Advent wreaths or calendars to inspire others. Engage in online discussions or prayer groups to foster spiritual growth and connection during the season.

Advent in the Modern World

Advent remains a meaningful season in today’s fast-paced world, blending traditional practices with modern spirituality, emphasizing hope, peace, and joy through reflection and community engagement.

10.1. Balancing Tradition with Contemporary Practices

Advent in the modern world seamlessly blends timeless traditions with contemporary practices, fostering spiritual growth. Families incorporate digital calendars and apps alongside traditional wreaths and candles, while social media platforms share reflections and prayers. This fusion allows individuals to honor the season’s historical significance while engaging in meaningful, modern ways that resonate with diverse lifestyles and cultural contexts, ensuring Advent remains relevant and inspiring for all.

10.2. The Relevance of Advent in Today’s Society

Advent remains deeply relevant in today’s fast-paced world, offering a time for reflection and hope amidst chaos. Its themes of anticipation and renewal resonate with people seeking meaning and connection. By emphasizing community, prayer, and gratitude, Advent provides a spiritual anchor, helping individuals and families navigate modern challenges while fostering a sense of purpose and joy during the holiday season.

10.3. Innovative Ways to Celebrate Advent

Modern celebrations blend tradition with creativity, such as themed Advent calendars, virtual devotionals, and community-wide events. Families can craft DIY projects, while individuals explore digital reflections or outdoor activities like candlelit walks. Incorporating cultural traditions and sharing experiences online fosters connection and joy, making Advent a fresh yet meaningful experience in today’s diverse and tech-driven world.

Advent is a meaningful season of reflection, renewal, and anticipation, guiding us to embrace the true spirit of Christmas with hope, peace, joy, and love.

11.1. Recap of Key Advent Traditions and Practices

Advent traditions include lighting candles on an Advent wreath, using calendars to count down to Christmas, and engaging in Scripture readings and reflections. Families often participate in crafts, prayers, and acts of kindness to foster spiritual growth. These practices emphasize hope, peace, joy, and love, preparing hearts for the celebration of Jesus’ birth. They blend faith, culture, and family bonding, making Advent a meaningful season of anticipation and renewal.

11.2. Final Thoughts on the Advent Season

Advent is a transformative season that invites reflection, renewal, and rejoicing. By embracing its traditions, we deepen our faith and foster a sense of community. As Advent concludes, it reminds us to carry its themes of hope, peace, joy, and love into our lives beyond Christmas, creating a lasting spiritual impact and anticipation for the coming year.

11.3. Looking Forward to Christmas

As Advent concludes, Christmas arrives, fulfilling the season’s promises. It is a time of joy, giving, and togetherness, celebrating the birth of Jesus. The anticipation built during Advent leads to this moment of celebration, where love, hope, and peace shine brightly. Christmas embodies the spirit of unity and renewal, offering a chance to reflect on the past year and embrace the magic of the season with family and friends.

interview questions for an instructional designer

Preparing for an instructional designer interview requires careful thought and research. This guide provides an overview of common questions, helping you understand the types of inquiries you may face. From technical skills to design processes, these questions are designed to assess your expertise and fit for the role. Use this resource to refine your responses and confidently showcase your abilities.

Importance of Preparation for Instructional Designer Interviews

Preparation is crucial for acing an instructional designer interview. It demonstrates professionalism and readiness to contribute meaningfully. Researching the company helps align your skills with their goals and audience needs. Understanding industry trends, such as new tools or methodologies, showcases your commitment to growth. Organizing your portfolio to highlight relevant projects and outcomes is essential. Practicing responses to common questions ensures clarity and confidence. Preparation also involves understanding how to articulate your design process, from needs assessment to execution. It highlights your problem-solving skills and ability to handle challenges. A well-prepared candidate stands out, proving they are serious about the role and eager to succeed. Dedication to preparation not only enhances your performance but also reflects your passion for instructional design and your readiness to contribute effectively.

Key Categories of Questions in Instructional Designer Interviews

Instructional designer interviews typically cover several key categories. General questions focus on your experience and passion for the field. Technical skills are assessed through inquiries about authoring tools and LMS familiarity. Process-oriented questions delve into your design methodology, needs assessment approaches, and project management strategies. Scenario-based and behavioral questions evaluate how you handle challenges, such as difficult stakeholders or tough decisions. Company-specific questions explore your alignment with their goals and audience understanding. Finally, candidates are often encouraged to ask the hiring manager questions, demonstrating engagement and curiosity. Understanding these categories allows you to tailor your preparation, ensuring comprehensive coverage of all potential topics. This structured approach helps you present a well-rounded perspective, showcasing both your technical expertise and your ability to adapt to the organization’s needs.

General Interview Questions for Instructional Designers

General questions focus on your experience, passion for instructional design, and how you stay updated with industry trends, providing insight into your foundational knowledge and enthusiasm for the field.

“Tell Me About Your Experience”

This question is an opportunity to highlight your background and showcase your relevance for the role. Be specific about your journey in instructional design, mentioning key projects, roles, and achievements. Discuss how your experience aligns with the company’s goals and the skills required for the position. Emphasize your hands-on experience with instructional design processes, tools, and technologies. Share examples of successful projects, detailing your contributions and the impact they had on learners or organizations. Avoid vague statements; instead, use concrete examples to demonstrate your expertise. Highlight both your technical skills and your ability to collaborate with stakeholders. This question is also a chance to show how you’ve grown professionally and how your experience prepares you for future challenges in the field. A well-structured answer can leave a strong impression on the interviewer.

“What Is Your Favorite Aspect of Instructional Design?”

This question allows you to share your passion and what drives your enthusiasm for the field. Be honest and highlight an aspect that genuinely excites you, whether it’s creating engaging content, solving learning challenges, or seeing the impact of your work on learners. For example, you might enjoy the creative process of designing interactive modules or the analytical side of needs assessment and data-driven decisions. Emphasize how your favorite aspect aligns with the company’s values and the role’s responsibilities. This is also an opportunity to demonstrate your commitment to instructional design and your eagerness to contribute meaningfully. A thoughtful answer can reveal your motivation and how you see yourself growing within the organization. Tailor your response to reflect your unique perspective and what makes you stand out as a candidate.

“How Do You Stay Current with Trends in Instructional Design?”

Staying current with trends in instructional design is crucial for delivering effective learning experiences. To keep up, I regularly follow industry blogs, attend webinars, and participate in professional communities; For example, I subscribe to platforms like LinkedIn Learning and the eLearning Guild to stay informed about the latest tools and methodologies. I also engage with instructional design forums and groups, where professionals share insights and best practices. Additionally, I make it a point to explore new authoring tools and learning management systems to understand their capabilities and limitations. Continuous learning is essential in this field, and I prioritize time each week to research and adapt to evolving trends. This proactive approach ensures I remain relevant and can apply innovative solutions to meet learners’ needs effectively. By staying informed, I can create meaningful and impactful learning experiences that align with current standards and technologies.

Technical Skills and Tools

Proficiency with Authoring Tools (e.g., Articulate Storyline, Adobe Captivate)

Interviewers often inquire about your expertise in authoring tools like Articulate Storyline and Adobe Captivate, as these are critical for creating interactive eLearning content. Be prepared to discuss your experience with these platforms, such as designing simulations, quizzes, and multimedia elements. Highlight specific features you’ve mastered, like responsive design in Storyline or advanced animations in Captivate. Describe how you’ve used these tools to enhance learner engagement and streamline the development process. For example, you might explain how you implemented gamification elements or synchronized audio with animations. Demonstrating hands-on familiarity and sharing examples from your portfolio can showcase your technical proficiency. Practice answering scenario-based questions, such as how you would troubleshoot common issues or optimize content for different devices. Emphasize your ability to leverage these tools to align with instructional design principles and meet project objectives effectively.

Familiarity with Learning Management Systems (LMS)

Familiarity with Learning Management Systems (LMS) is a key area of focus in instructional designer interviews. Interviewers often ask about your experience with platforms like Moodle, Canvas, or Blackboard, as these systems are central to deploying and managing eLearning content. Be prepared to discuss how you’ve used LMS features such as course uploads, user enrollment, and progress tracking. Highlight your ability to troubleshoot common issues, like course compatibility or accessibility concerns. Additionally, describe how you’ve leveraged LMS analytics to assess learner performance and inform design improvements. Showcase your understanding of how to optimize content for seamless integration with LMS platforms. If you’ve experience with SCORM or xAPI standards, mention how you’ve ensured compliance. Demonstrating practical knowledge of LMS functionalities will underscore your ability to deliver scalable and effective learning solutions.

“What Project Management Tools Do You Use for Instructional Design Projects?”

When asked about project management tools for instructional design projects, highlight your experience with tools like Trello, Asana, or Jira. Explain how these tools help organize tasks, track progress, and meet deadlines. Mention collaboration features, such as assigning tasks to team members or sharing updates with stakeholders. If you’ve used specialized tools like Smartsheet or Microsoft Project, discuss their benefits for complex projects. Emphasize how these tools enhance communication and transparency, ensuring all team members are aligned. Additionally, note any integrations with authoring tools or LMS platforms that streamline workflows. Provide examples of how effective project management has improved your design processes and outcomes. Showcasing your proficiency in these tools demonstrates your ability to manage projects efficiently and deliver high-quality results.

Instructional Design Process and Strategies

This section explores how instructional designers approach the creation of learning experiences, from initial analysis to final implementation. It delves into strategies for needs assessment, design processes, and project outcomes, ensuring alignment with learning objectives and stakeholder expectations.

“Walk Us Through Your Step-by-Step Design Process”

When asked to describe your step-by-step design process, it’s crucial to provide a clear and structured overview. Begin with needs assessment, where you identify the audience’s requirements and learning objectives. Next, outline the design phase, including how you create storyboards, select multimedia elements, and develop content. Then, explain the development stage, where you build the course using authoring tools like Articulate Storyline or Adobe Captivate. Discuss implementation, focusing on how you deploy the course, often through a Learning Management System (LMS). Finally, highlight evaluation, where you assess learner feedback and analyze performance metrics to refine the design. Emphasize collaboration with stakeholders throughout the process and how you ensure alignment with business goals. This demonstrates your systematic approach and commitment to creating effective learning experiences.

How You Approach Needs Assessment and Analysis

Your approach to needs assessment and analysis is critical in instructional design. Begin by identifying the target audience and their specific needs through surveys, interviews, or observations. Analyze organizational goals to ensure alignment with the learning objectives. Assess existing knowledge gaps and performance issues to determine the scope of the training required. Consider the learning environment and any constraints, such as budget or technology limitations. Use data to prioritize needs and define measurable outcomes. Collaborate with stakeholders to validate findings and ensure buy-in. Finally, document your analysis to guide the design process and ensure the solution addresses both learner and organizational needs effectively. This systematic approach demonstrates your ability to create relevant and impactful learning experiences.

“Tell Us About One Project That Went Very Well. What Went Right?”

When describing a successful project, focus on specific details and outcomes. Choose a project that highlights your instructional design skills and problem-solving abilities. Explain the challenge, your role, and the steps you took to address it. For example, you might discuss how you collaborated with stakeholders to identify learning objectives, designed engaging content using authoring tools, and ensured alignment with organizational goals. Emphasize what went right, such as effective communication, timely delivery, or innovative solutions. Mention any positive feedback or measurable results, like increased learner engagement or improved performance metrics. This question allows you to showcase your expertise and how you contribute to successful outcomes. Be concise, specific, and results-oriented in your response.

Scenario-Based and Behavioral Questions

These questions assess your problem-solving skills and judgment in real-world scenarios. Examples include handling difficult stakeholders, making tough decisions, and ensuring learner engagement, showcasing your instructional design expertise.

“How Do You Handle a Difficult Stakeholder?”

This question evaluates your interpersonal and conflict-resolution skills. Emphasize active listening to understand their concerns and align their needs with project goals. Maintain open communication, remain professional, and focus on collaborative problem-solving to ensure stakeholder satisfaction and project success.

  • Highlight your ability to understand their perspective and address their needs.
  • Explain how you maintain open communication and transparency.
  • Share examples of successfully resolving conflicts or disagreements.

By showcasing your patience and problem-solving skills, you demonstrate your ability to manage challenging situations effectively while maintaining a positive relationship with stakeholders.

“Describe a Situation Where You Had to Make a Tough Decision in a Project”

This question assesses your problem-solving and decision-making abilities. Provide a specific example from your experience, detailing the context, the challenges faced, and the decision-making process. Highlight how you analyzed the situation, weighed the pros and cons, and chose the best course of action. Emphasize the outcome and what you learned from the experience.

  • Describe the situation and the key stakeholders involved.
  • Explain the factors that made the decision difficult.
  • Outline the steps you took to reach a resolution.

By sharing a clear, impactful example, you demonstrate your ability to handle complex scenarios and make sound judgments under pressure.

“How Do You Ensure Learner Engagement in Your Designs?”

Ensuring learner engagement is a critical aspect of instructional design. To achieve this, focus on creating interactive and immersive experiences that cater to diverse learning preferences. Incorporate elements like quizzes, simulations, and collaborative activities to make content dynamic. Personalized learning paths and real-world applications can also enhance relevance and motivation. Additionally, use feedback mechanisms to gauge learner progress and adjust the design accordingly. Clear navigation and intuitive user interfaces help learners stay focused. Lastly, aligning content with learning objectives ensures that engagement is purposeful and meaningful. By integrating these strategies, you can create designs that captivate learners and promote effective knowledge retention.

Company and Role-Specific Questions

These questions focus on aligning your skills with the company’s goals and understanding the role’s expectations. Prepare to discuss why you’re interested in the organization and how you can contribute to its objectives.

“Why Do You Want to Work for This Company?”

This question allows you to showcase your research and genuine interest in the organization. Highlight specific aspects of the company, such as its mission, values, or innovative projects, that resonate with your professional goals. Emphasize how your skills and experience align with their objectives, demonstrating how you can contribute meaningfully. For example, you might mention their commitment to cutting-edge eLearning solutions or their focus on learner-centric design. Be specific and avoid generic responses, showing that you’ve taken the time to understand their unique strengths and culture. This not only illustrates your enthusiasm but also reveals how you see yourself growing within the organization.

“How Do You Align Instructional Design with Business Goals?”

Aligning instructional design with business goals requires a strategic approach. Start by understanding the organization’s objectives and identifying how training initiatives can support them. Collaborate with stakeholders to define measurable outcomes and ensure that the content addresses specific performance gaps. Use data and analytics to assess the impact of your designs and make data-driven decisions. For example, if the business goal is to improve sales, your training might focus on product knowledge and communication skills. Regularly review and adapt your designs to stay aligned with evolving business priorities. This ensures that your work contributes directly to the organization’s success and demonstrates the value of instructional design as a strategic tool.

“What Do You Know About Our Target Audience?”

Understanding the target audience is crucial for effective instructional design. Researching their demographics, job roles, skill levels, and learning preferences helps create relevant and engaging content. For example, if the audience includes frontline employees, the training should focus on practical, applicable skills. Conversely, leadership training might emphasize strategic decision-making. Analyzing learner needs ensures that the design aligns with their goals and addresses knowledge gaps. Collaborating with stakeholders to gather insights about the audience’s challenges and motivations is also key. This understanding allows you to tailor the content, delivery method, and assessment strategies to meet their needs effectively. Demonstrating this knowledge shows your ability to create impactful, audience-centered learning experiences that drive real results for the organization.

Questions to Ask the Hiring Manager

Asking thoughtful questions during an interview demonstrates engagement and proactive thinking. Inquire about challenges the team faces, day-to-day responsibilities, and opportunities for growth to align your skills with the role.

“What Are the Biggest Challenges Facing the Instructional Design Team?”

This question allows you to understand the team’s current obstacles, such as limited resources, tight deadlines, or adapting to new technologies. It shows your interest in contributing to solutions and aligning your skills with their needs. By asking this, you can gauge the team’s dynamics and how your expertise might help address these challenges.

“Can You Describe the Day-to-Day Responsibilities of This Role?”

Asking about the day-to-day responsibilities of the role provides clarity on expectations and helps you align your skills with the position. This question reveals the specific tasks, such as collaborating with stakeholders, designing content, or using authoring tools. It also gives insight into the team’s workflow and how the role contributes to broader organizational goals. Understanding the daily responsibilities allows you to prepare relevant examples from your experience and demonstrate how you can meet the demands of the position. Additionally, this question highlights whether the role aligns with your career goals and work style, ensuring a better fit for both you and the employer. By asking this, you show your commitment to understanding the role deeply and your readiness to contribute effectively.

“What Opportunities for Professional Development Are Available?”

Asking about professional development opportunities demonstrates your commitment to growth and aligning with the company’s vision. This question helps you understand the resources available, such as workshops, certifications, or mentorship programs. It also reveals the organization’s investment in employee development, ensuring you can enhance your skills and stay updated with industry trends. Knowing the opportunities for growth allows you to assess whether the role aligns with your long-term career goals. Additionally, this question highlights the company’s culture and willingness to support continuous learning, which is crucial in the evolving field of instructional design. By inquiring about professional development, you signal your eagerness to contribute and evolve within the organization, making it a win-win for both you and the employer. This insight ensures you can thrive and remain competitive in your career.

Portfolio and Work Samples

Your portfolio is a cornerstone of your interview, showcasing your instructional design skills and experience. Highlight successful projects that demonstrate your expertise in creating engaging learning experiences, proving your capabilities and creativity in practice. This practical evidence helps employers assess your ability to deliver impactful training solutions, aligning with their needs and expectations. By sharing specific examples, you illustrate your problem-solving skills and commitment to effective instructional design, making your portfolio a powerful tool in your job search. Ensure it reflects your best work and is tailored to the role, emphasizing relevance and results. This strategic approach strengthens your candidacy and leaves a lasting impression on potential employers, showcasing your value as an instructional designer. Your portfolio is your story—make it compelling and results-driven.

“How Does Your Portfolio Reflect Your Instructional Design Skills?”

Your portfolio is a direct reflection of your instructional design expertise, showcasing your ability to create engaging and effective learning experiences. Each project within your portfolio should demonstrate your understanding of instructional design principles, such as analyzing learning needs, designing tailored solutions, and implementing strategies that enhance learner engagement. Highlight specific examples that illustrate your proficiency in using authoring tools, developing multimedia content, and aligning designs with organizational goals. Emphasize your problem-solving skills and ability to collaborate with stakeholders to address learning challenges. By sharing concrete examples of successful projects, you provide evidence of your technical and creative capabilities, making it easier for employers to envision your contributions to their team. A well-curated portfolio not only showcases your skills but also tells a story of your professional growth and commitment to instructional excellence.

“Can You Share an Example of a Successful Project You Led?”

When discussing a successful project, focus on your leadership role, the challenges you faced, and the outcomes achieved. For example, describe how you led a team to design an eLearning module that improved employee performance by 30%. Highlight your use of instructional design models like ADDIE or Agile to structure the project. Mention specific tools, such as Articulate Storyline or Adobe Captivate, and how they contributed to the project’s success. Emphasize collaboration with stakeholders, such as conducting needs assessments and incorporating feedback. Quantify results, like increased learner engagement or reduced training time, to demonstrate impact. This example showcases your problem-solving skills, technical expertise, and ability to deliver measurable results, aligning with the goals of instructional design and organizational success.

Additional Tips and Strategies

Research the company, practice answering behavioral questions, and showcase your portfolio. Highlight adaptability, problem-solving skills, and enthusiasm for instructional design. Follow up with a thank-you note post-interview.

The Importance of Researching the Company Before the Interview

Researching the company before your interview is crucial to making a positive impression and demonstrating your interest in the role. Understanding the company’s mission, values, and goals allows you to tailor your responses and showcase how your skills align with their objectives. Familiarize yourself with their products, services, and target audience to highlight your relevance. Additionally, reviewing recent projects or news about the company can provide valuable talking points. This preparation not only helps you ask meaningful questions but also shows your enthusiasm and initiative. By aligning your experience with the company’s needs, you position yourself as a strong candidate who is ready to contribute effectively. Researching the company is a key step in standing out during the interview process.

How to Follow Up After an Instructional Design Interview

Following up after an instructional design interview is essential to leave a lasting impression and demonstrate professionalism. Send a thank-you note within 24 hours, expressing gratitude for the opportunity and reiterating your interest in the role. Personalize the message by referencing specific topics discussed during the interview. This not only shows appreciation but also reinforces your enthusiasm for the position. Additionally, if you haven’t heard back within a week, a polite follow-up email can help keep you on their radar. Remember to stay professional and concise, avoiding overly aggressive communication. Finally, consider connecting with the interviewer or company on LinkedIn to maintain visibility and stay engaged with their content. A thoughtful follow-up can make a significant difference in the hiring process.