Bosch’s 44 dBA dishwashers offer quiet operation and efficient cleaning.
Accessing hidden settings via media3.bosch-home.com/Documents/9001363081_B.pdf
unlocks advanced features, enhancing your dishwashing experience.
Overview of the Series
Bosch’s SilencePlus series, including the 44 dBA models, prioritizes exceptionally quiet operation without compromising cleaning performance. These dishwashers are designed for modern kitchens, offering a blend of functionality and sleek aesthetics. The series encompasses various models, each with slightly differing features, but all share core technologies like Bosch’s PrecisionWash and CrystalDry systems.
Understanding your specific model requires consulting the user manual, available online at bosch-home.com. Resources like media3.bosch-home.com/Documents/9001363081_B.pdf provide detailed insights into accessing hidden settings and maximizing your dishwasher’s capabilities. Registration on bosch-home.com unlocks additional benefits and support.
Key Features and Benefits
Bosch 44 dBA dishwashers boast a remarkably quiet operation, thanks to advanced sound insulation. PrecisionWash technology delivers targeted cleaning, while CrystalDry ensures sparkling, dry dishes – even plastics. The series offers flexible loading with adjustable racks and a variety of wash cycles, including Eco and Quick Wash.
Accessing hidden settings, detailed in resources like media3.bosch-home.com/Documents/9001363081_B.pdf, allows for customization. Registering your appliance at bosch-home.com provides access to manuals, FAQs, and warranty information, maximizing your ownership experience.
Safety Instructions
Read the user manual carefully before installation and operation. Bosch dishwashers require proper grounding and adherence to all safety guidelines for safe use.
General Safety Guidelines
Prior to operating your Bosch dishwasher, thoroughly review the provided user manual. This document details crucial safety information regarding installation, operation, and maintenance procedures. Ensure the appliance is correctly grounded to prevent electrical hazards. Always supervise children near the dishwasher, as detergents are harmful if ingested.
Never attempt to repair the dishwasher yourself; contact qualified service personnel for assistance. Disconnect the power supply before performing any cleaning or maintenance. Only use dishwasher-safe detergents and rinse aids, following dosage guidelines. Improper use can damage the appliance and void the warranty.
Important Warnings
Read the entire manual before using the dishwasher to avoid potential hazards. Do not operate the appliance if it’s damaged or malfunctioning. Immediately disconnect power if any issues arise. Hot water temperatures exceeding 140°F (60°C) can cause scalding; exercise caution when opening the door during or after a wash cycle;
Keep detergents and rinse aids out of reach of children. Never climb or lean on the open dishwasher door. Improper installation can create risks; adhere to the provided installation instructions. Failure to follow these warnings may result in injury or damage.
Proper Installation Procedures
Ensure a level floor and adequate space for ventilation, following the dimensions outlined in the manual. Connect the water supply and drain hose securely, checking for leaks. Electrical connection must comply with local codes; a dedicated circuit is recommended. Properly ground the dishwasher to prevent electrical shock.
Verify the dishwasher is stable and doesn’t rock. Adhere to all safety instructions during installation. Incorrect installation can void the warranty and create hazardous conditions. Consult a qualified technician if unsure about any step of the process.
Understanding the Control Panel
The control panel features intuitive buttons and display indicators. Refer to the manual (media3.bosch-home.com/Documents/9001363081_B.pdf) to decipher symbols and access hidden settings.
Button Functions Explained
Each button on the Bosch 44 dBA dishwasher control panel initiates a specific function, streamlining operation. The Power button activates/deactivates the unit, while cycle selection buttons – Normal, Heavy, Delicate – determine wash intensity. Options like Sanitize and Half Load modify cycle parameters.
The Delay Start button allows programmed operation, and the manual (media3.bosch-home.com/Documents/9001363081_B.pdf) details accessing advanced features. Understanding these functions ensures optimal performance and customized cleaning for various dishware types and soil levels. Proper button usage maximizes efficiency.
Display Indicators and Symbols
The Bosch 44 dBA dishwasher’s display utilizes symbols to communicate status and cycle information. Indicators signal cycle progress, remaining time, and selected options like Sanitize or Half Load. Error codes, detailed in the manual (media3.bosch-home.com/Documents/9001363081_B.pdf), alert users to potential issues.
Symbols for rinse aid levels and filter cleanliness provide maintenance reminders. Familiarizing yourself with these indicators ensures efficient operation and proactive troubleshooting. The display offers a quick overview of the dishwasher’s current state, enhancing user control and understanding.
Accessing Hidden Settings (Referencing media3.bosch-home.com/Documents/9001363081_B.pdf)
Beyond the standard control panel functions, Bosch dishwashers offer hidden settings for customization. Referencing media3.bosch-home.com/Documents/9001363081_B.pdf reveals procedures for accessing these advanced options. These settings can adjust parameters like soil level sensitivity, drying performance, and cycle modifications.
The manual details specific button combinations and sequences to unlock these features, allowing users to tailor the dishwasher’s operation to their preferences. Exploring these hidden settings maximizes the appliance’s potential and optimizes cleaning results.
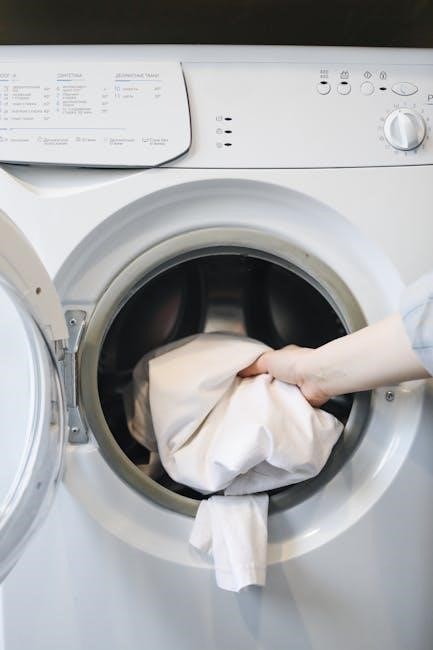
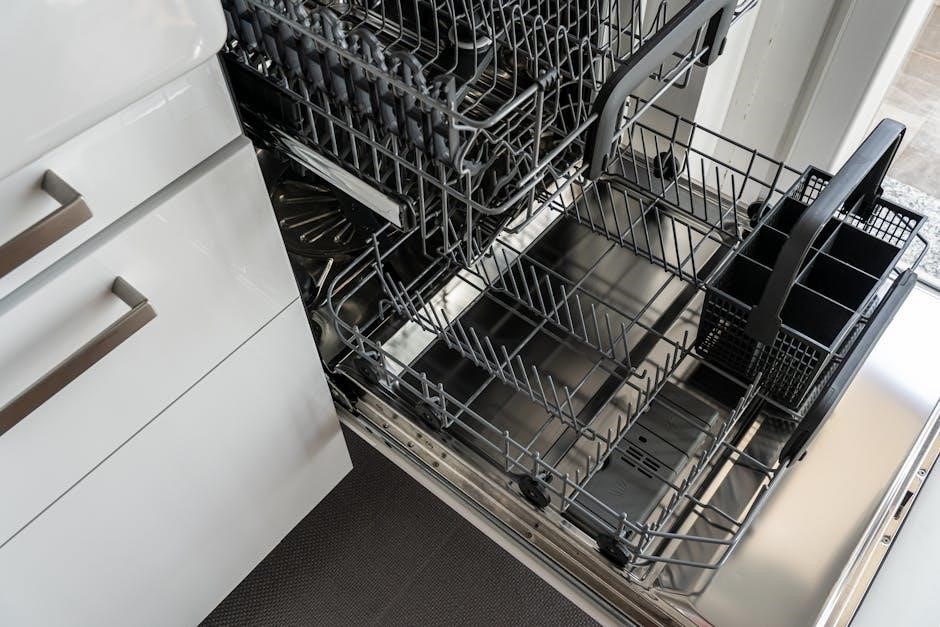
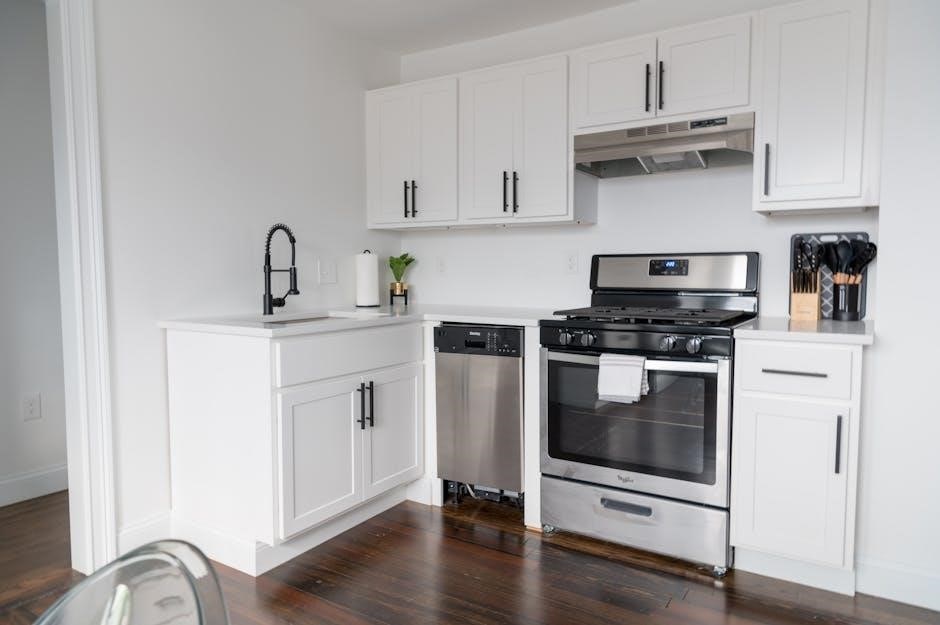
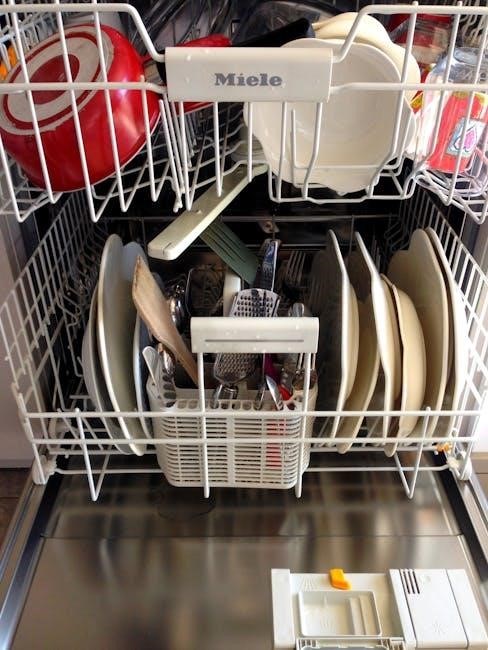
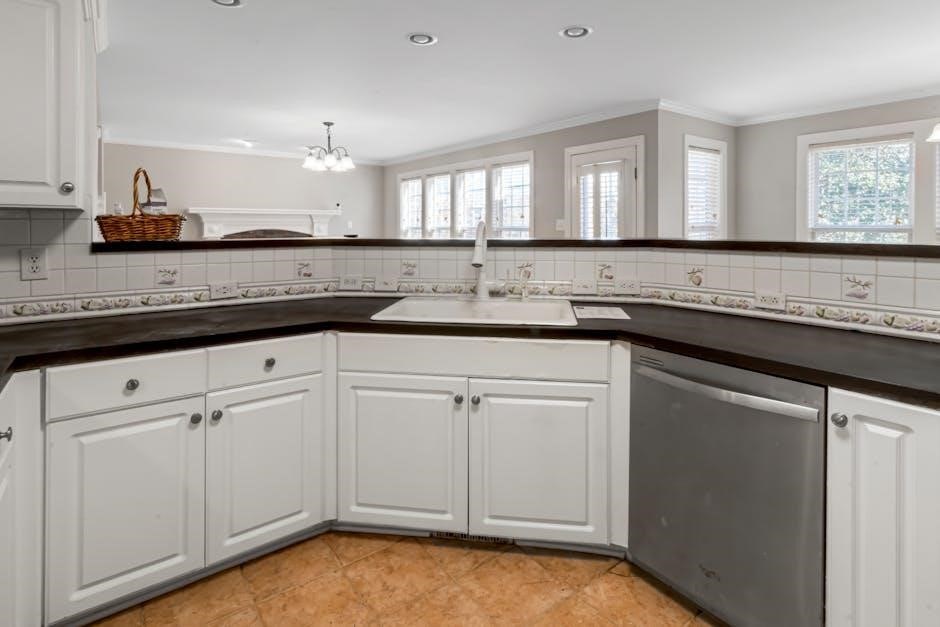
Loading and Unloading the Dishwasher
Proper rack arrangement and using dishwasher-safe items are crucial. The manual guides optimal loading for thorough cleaning, ensuring efficient water circulation and spotless results.
Proper Rack Arrangement
Maximizing space and cleaning performance requires thoughtful rack arrangement. The Bosch dishwasher manual details how to position dishes, ensuring water reaches all surfaces.
Place larger items on the bottom rack, avoiding obstruction of the spray arm.
Secure glasses and cups in the upper rack, utilizing adjustable features for stability.
Avoid overcrowding; allow water to circulate freely between items.
Consult the manual for specific loading recommendations based on dishware type, optimizing cleaning results and preventing damage.
Suitable Dishware and Kitchenware
The Bosch dishwasher manual emphasizes using only dishwasher-safe items. Generally, most ceramic, glass, and plastic dishware labeled “dishwasher safe” are suitable.
Stainless steel cookware is typically safe, but certain materials may require handwashing to prevent discoloration.
Check for manufacturer’s markings indicating dishwasher compatibility before loading.
Avoid delicate items or those with painted or glued-on decorations, as they may fade or detach during the wash cycle. Proper selection ensures longevity and optimal cleaning.
Items to Avoid Placing in the Dishwasher
The Bosch dishwasher manual strongly advises against washing certain items. Specifically, avoid wooden utensils, as they can warp and crack.
Cast iron cookware should be handwashed to prevent rust.
Aluminum items may discolor, and delicate glassware or crystal can easily break.
Hand-painted dishes, non-stick cookware, and items with glued parts are also unsuitable.
Following these guidelines protects your dishwasher and ensures the longevity of your valuable kitchenware.

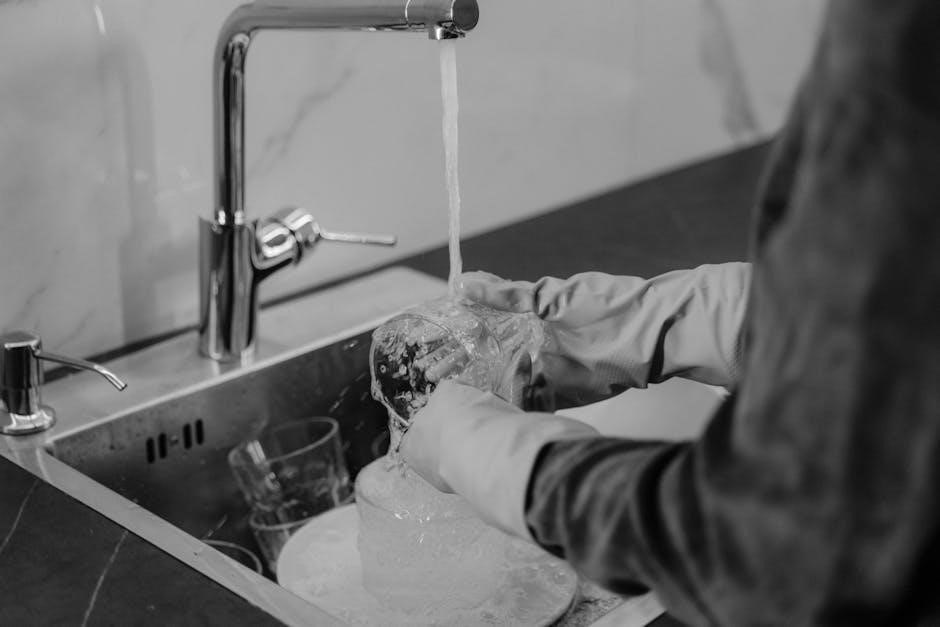
Detergent and Rinse Aid
The Bosch manual recommends using quality dishwasher detergents. Proper dosage is crucial for optimal cleaning;
avoid overfilling. Rinse aid enhances drying and prevents water spots, improving overall results.
Recommended Detergent Types
Bosch dishwashers are compatible with a variety of detergent types, including powder, gel, and tablets. However, the manual strongly advises against using hand dish soap, as it creates excessive suds and can damage the appliance. For best results, utilize detergents specifically formulated for automatic dishwashers. Consider using phosphate-free detergents to minimize environmental impact. Ensure the detergent is fresh and stored in a cool, dry place to maintain its effectiveness. Avoid using old or clumped detergent, as it may not dissolve properly, leading to residue on dishes. Always follow the detergent manufacturer’s instructions for proper usage and dosage.
Detergent Dosage Guidelines
The appropriate detergent dosage depends on water hardness and the level of food soil on dishes. Generally, for soft water, use less detergent; for hard water, use more. Refer to your local water authority for hardness information. Typically, 1-2 tablespoons of powder or gel detergent are sufficient. If using tablets, one tablet is usually adequate. Avoid overfilling the detergent dispenser, as this can lead to residue. Adjust the dosage based on load size and soil level – heavier loads require more detergent. Consult the dishwasher manual for specific recommendations.
Rinse Aid Usage and Benefits
Rinse aid significantly improves drying performance, especially with plastic items. It reduces water spots and film, leaving dishes sparkling clean. Fill the rinse aid dispenser until the indicator window shows it’s full. Adjust the dosage setting based on water hardness – higher hardness requires a higher setting. Using rinse aid also helps dishes load and unload more easily. Regular use prevents mineral buildup inside the dishwasher, prolonging its lifespan. Check the rinse aid level periodically and refill as needed for optimal results.

Wash Cycles
Bosch dishwashers offer cycles like Normal, Heavy Duty, Delicate, Quick Wash, and Eco. These cycles cater to varying soil levels and dish types, ensuring optimal cleaning.
Normal Cycle
The Normal cycle is designed for everyday dishwashing needs, effectively cleaning normally soiled dishes. It balances cleaning performance with energy and water consumption, making it a versatile option for daily use. This cycle is suitable for a wide range of dishware, including plates, glasses, and cookware.
For optimal results, ensure proper loading and use the recommended detergent dosage. The Normal cycle typically utilizes moderate water temperature and spray pressure, providing thorough cleaning without being overly aggressive. Refer to your dishwasher’s manual, specifically media3.bosch-home.com/Documents/9001363081_B.pdf, for detailed settings and adjustments.
Heavy Duty Cycle
The Heavy Duty cycle is engineered for tackling heavily soiled dishes, pots, and pans. This cycle employs higher water temperatures and increased spray pressure to effectively remove stubborn food residues. It’s ideal for baked-on messes and items that require intense cleaning power.
For best results, pre-scraping large food particles is recommended, but pre-rinsing isn’t necessary. Consult your Bosch dishwasher’s manual – media3.bosch-home.com/Documents/9001363081_B.pdf – for specific detergent recommendations and cycle duration details. This cycle uses more energy and water than lighter wash programs.
Delicate/Glassware Cycle
The Delicate/Glassware cycle is specifically designed for fragile items like stemmed glassware, crystal, and delicate china. This cycle utilizes lower water temperatures and a gentler spray pattern to prevent chipping or breakage. It ensures thorough cleaning without compromising the integrity of your delicate dishware.
Refer to your Bosch dishwasher manual – media3.bosch-home.com/Documents/9001363081_B.pdf – for optimal detergent usage. Avoid overloading the dishwasher during this cycle to allow for proper water circulation. This cycle is ideal for items requiring a gentle yet effective cleaning process.
Quick Wash Cycle
The Quick Wash cycle provides a fast and efficient cleaning solution for lightly soiled dishes. This cycle significantly reduces wash time, making it perfect for smaller loads or when you’re short on time. While faster, it still delivers a respectable cleaning performance.
Consult your Bosch dishwasher manual – media3.bosch-home.com/Documents/9001363081_B.pdf – for detergent recommendations. It’s best suited for items without heavily baked-on food residue. This cycle prioritizes speed without sacrificing essential cleaning power, offering convenience for everyday use.
Eco Cycle
The Eco Cycle on your Bosch dishwasher is designed for maximum energy and water efficiency. This cycle utilizes lower temperatures and extended wash times to achieve optimal cleaning results while minimizing resource consumption. It’s an environmentally conscious choice for everyday dishwashing;
Refer to your user manual – media3.bosch-home.com/Documents/9001363081_B.pdf – for specific load recommendations. While effective, it may take longer than other cycles. The Eco Cycle is ideal for regularly soiled dishes, promoting sustainability without compromising cleanliness.
Special Functions
Bosch dishwashers offer features like Sanitize, Half Load, and Delay Start.
Consult media3.bosch-home.com/Documents/9001363081_B.pdf for detailed instructions on utilizing these functions effectively.
Sanitize Option
The Sanitize Option elevates water temperature to eliminate 99.9% of bacteria, ensuring exceptionally hygienic cleaning. This function is ideal for baby bottles, cutting boards, and items requiring a higher level of sanitation. Refer to your Bosch dishwasher’s manual, specifically media3.bosch-home.com/Documents/9001363081_B.pdf, for precise activation instructions and cycle details.
It’s crucial to understand that utilizing the sanitize option may slightly increase energy consumption. However, the added peace of mind regarding cleanliness is often considered worthwhile, particularly for households with young children or health-sensitive individuals. Always check dishwasher-safe labeling on items before using this feature.
Half Load Option
The Half Load Option is a valuable feature for conserving water and energy when washing smaller dish loads. Instead of waiting for a full load, you can efficiently clean a half-filled dishwasher. Consult your Bosch dishwasher manual, available at media3.bosch-home.com/Documents/9001363081_B.pdf, to locate the specific activation method for your model.
This option adjusts the wash cycle to use less water and energy, making it an eco-friendly choice. While effective, remember that heavily soiled items may benefit from a full cycle for optimal cleaning performance. It’s a practical solution for daily use and smaller households.
Delay Start Function
The Delay Start Function allows you to schedule your dishwasher to begin a cycle at a later, more convenient time. This is particularly useful for taking advantage of off-peak energy rates or ensuring dishes are clean when you need them. Refer to your Bosch dishwasher’s manual – found at media3.bosch-home.com/Documents/9001363081_B.pdf – for detailed instructions on setting the delay timer.
Typically, you’ll select the desired delay duration (e.g., 3, 6, or 9 hours). Remember to add detergent before activating the delay start to ensure proper cleaning. This feature provides flexibility and optimizes your dishwashing routine.
Maintenance and Cleaning
Regular maintenance, including filter and spray arm cleaning, ensures optimal performance.
Consult the Bosch manual (media3.bosch-home.com/Documents/9001363081_B.pdf)
for detailed procedures and maintain your dishwasher’s efficiency.
Filter Cleaning Procedures
Maintaining a clean filter is crucial for optimal dishwasher performance. The Bosch dishwasher manual (media3.bosch-home.com/Documents/9001363081_B.pdf) details a three-part filtration system requiring regular attention. First, remove the lower basket, then the filter cylinder by turning it counterclockwise.
Separate and rinse each filter component – the coarse filter, fine filter, and the filter cover – under running water, removing any food particles. Use a soft brush if needed. Reassemble the filter correctly, ensuring proper alignment before locking it back into place. Regular cleaning prevents clogs and ensures efficient water circulation.
Spray Arm Cleaning
Ensuring clean spray arms is vital for thorough dish cleaning. The Bosch dishwasher manual (media3.bosch-home.com/Documents/9001363081_B.pdf) recommends periodic inspection and cleaning. Carefully remove the upper and lower spray arms – typically by unscrewing or unclipping them.
Inspect the spray arm holes for blockages caused by food debris. Use a toothpick or fine wire to clear any obstructions. Rinse the spray arms thoroughly under running water. Reattach the spray arms securely, ensuring they rotate freely. Regular cleaning maintains optimal water pressure and spray coverage.
Exterior Cleaning Instructions
Maintaining a clean exterior enhances your Bosch dishwasher’s appearance. The user manual (media3.bosch-home.com/Documents/9001363081_B.pdf) advises using a damp cloth with mild dish soap for stainless steel surfaces. Avoid abrasive cleaners, as they can scratch the finish.
For plastic or painted surfaces, a gentle all-purpose cleaner is suitable. Wipe down the control panel carefully, avoiding excessive moisture. Dry the exterior thoroughly with a soft cloth to prevent water spots. Regular cleaning prevents buildup and keeps your dishwasher looking its best;

Troubleshooting Common Issues
Refer to the manual (media3.bosch-home.com/Documents/9001363081_B.pdf) for error code definitions and solutions. It guides resolving start failures,
poor cleaning, and drying problems.
Dishwasher Not Starting
If your Bosch dishwasher fails to start, first verify the power supply and circuit breaker. Consult the manual (media3.bosch-home.com/Documents/9001363081_B.pdf) to ensure the door is securely latched, as a safety mechanism prevents operation if ajar.
Check for any error codes displayed, referencing the manual for their specific meanings and troubleshooting steps. A reset may be necessary; unplug the dishwasher for a few minutes, then plug it back in. If issues persist, the start relay or control board might require professional attention.
Poor Cleaning Performance
Experiencing unsatisfactory cleaning results? Begin by verifying proper loading techniques – avoid overcrowding and ensure spray arms aren’t obstructed. Refer to your Bosch dishwasher manual (media3.bosch-home.com/Documents/9001363081_B.pdf) for optimal rack arrangement.
Confirm adequate detergent usage, selecting a type recommended for your water hardness. Clean the filter regularly, as buildup hinders performance. Inspect and clear any debris from the spray arms. If problems continue, a more intensive wash cycle might be needed.
Drying Issues
If dishes remain wet after a cycle, several factors could be at play. Ensure rinse aid is adequately filled and properly dispensed – it significantly aids drying. Consult your Bosch dishwasher manual (media3.bosch-home.com/Documents/9001363081_B.pdf) for specific rinse aid dosage recommendations.
Verify proper loading; avoid nesting items that prevent water runoff. Some models offer adjustable drying settings – explore these via hidden settings in the manual. Check for blocked vents or a malfunctioning heating element if issues persist.
Error Codes and Their Meanings
Bosch dishwashers utilize error codes to diagnose issues. These codes, displayed on the control panel, indicate specific problems requiring attention. Refer to your Bosch 44 dBA dishwasher manual (media3.bosch-home.com/Documents/9001363081_B.pdf) for a comprehensive list and detailed explanations of each code.
Common codes relate to water supply, drainage, or sensor malfunctions. The manual provides troubleshooting steps for each error, potentially saving a service call. Ignoring error codes can lead to further damage, so prompt investigation is crucial.
Registering Your Appliance
Registering your Bosch dishwasher at bosch-home.com unlocks benefits and support. Create a MyBosch account for personalized perks and easy access to resources.
Benefits of Registration (bosch-home.com)
Registering your new Bosch dishwasher on bosch-home.com provides numerous advantages. You gain access to exclusive benefits designed to enhance your ownership experience. This includes personalized tips and tricks tailored to your specific model, ensuring optimal performance.
Furthermore, registration simplifies access to vital support resources, such as online manuals, FAQs, and direct contact with Bosch customer service. You’ll also receive updates on software enhancements and be the first to know about special offers. Creating a MyBosch account streamlines this process, offering a centralized hub for all your appliance needs.
MyBosch Account Setup
Creating a MyBosch account is a straightforward process, unlocking a world of convenience for your appliance management. Visit bosch-home.com and navigate to the registration section. You’ll need your appliance’s model number and serial number, typically found on the appliance itself or in the documentation.
Follow the on-screen prompts to create a secure account, providing your contact information. Once registered, you can easily access your appliance’s manual, warranty details, and schedule service appointments. MyBosch centralizes all your appliance-related information, simplifying ownership and support.
Resources and Support
Bosch provides extensive support through its customer service team and online resources at bosch-home.com.
Download manuals, explore FAQs, and verify your warranty details easily.
Bosch Customer Service Contact Information
For immediate assistance with your Bosch 44 dBA dishwasher, reach out to Bosch’s dedicated customer service team. While specific contact details vary, bosch-home.com serves as the central hub for support.
You can typically find phone numbers, email addresses, and live chat options on their website. Be prepared to provide your appliance’s model number for efficient service. Additionally, the online resources, including the downloadable manual at media3.bosch-home.com/Documents/9001363081_B.pdf, often resolve common queries quickly.
Online Manuals and FAQs (bosch-home.com)
Bosch’s website, bosch-home.com, is a comprehensive resource for your 44 dBA dishwasher. You’ll find downloadable user manuals, including the detailed guide available at media3.bosch-home.com/Documents/9001363081_B.pdf, covering installation, operation, and maintenance.
A robust Frequently Asked Questions (FAQ) section addresses common issues and troubleshooting steps. This online support system empowers users to self-resolve problems and maximize their dishwasher’s performance, offering a convenient alternative to direct customer service contact.
Warranty Information
Bosch offers a warranty on its 44 dBA dishwashers, providing peace of mind against manufacturing defects. Specific warranty terms and duration vary based on the model and region; details are available on bosch-home.com.
Registration of your appliance at bosch-home.com is crucial for warranty validation and streamlined service requests. Retain your proof of purchase and refer to the user manual, including resources like media3.bosch-home.com/Documents/9001363081_B.pdf, for complete warranty information.