Hanuman Chalisa in PDF Format: A Comprehensive Guide
Discover readily available Hanuman Chalisa PDFs in various languages – English, Hindi, and Gujarati – for convenient access and devotional practice․
Numerous online resources offer free downloads, ensuring widespread accessibility to this sacred text for all devotees seeking spiritual enrichment․
What is the Hanuman Chalisa?
The Hanuman Chalisa is a Hindu devotional hymn (stotra) dedicated to Lord Hanuman, a revered deity symbolizing strength, devotion, and selfless service․ Composed in the Awadhi dialect, it consists of forty verses (chaupais) celebrating Hanuman’s virtues and recounting episodes from his life, particularly his unwavering loyalty to Lord Rama․
This powerful hymn isn’t merely a recitation; it’s a spiritual practice believed to invoke Hanuman’s blessings, offering protection, courage, and the removal of obstacles․ The verses vividly portray Hanuman’s extraordinary abilities – his strength, his flying prowess, his wisdom, and his humility․

Widely accessible in various formats, including PDF, the Hanuman Chalisa allows devotees to easily engage with its sacred verses․ Its popularity stems from its simplicity and profound spiritual impact, making it a cornerstone of Hindu devotional practice for centuries․ The Chalisa’s verses are designed to be easily memorized and recited, fostering a deep connection with the divine․
Historical Background of the Hanuman Chalisa
The Hanuman Chalisa’s origins are deeply rooted in 16th-century India, specifically linked to the renowned poet and devotee, Tulsidas․ While the exact date of composition remains debated, scholarly consensus places its creation sometime during the reign of the Mughal emperor Akbar․ This period witnessed a flourishing of devotional literature in the Awadhi dialect, the language in which the Chalisa is written․
The hymn emerged within a broader context of the Bhakti movement, emphasizing personal devotion and love for God․ Tulsidas, profoundly inspired by Lord Hanuman’s unwavering devotion to Rama, crafted the Chalisa as a means for devotees to connect with Hanuman’s divine energy․
Its initial circulation likely occurred through oral tradition and handwritten manuscripts, eventually gaining widespread popularity․ The advent of printing technology facilitated its broader dissemination, and today, it’s readily available in numerous printed editions and, increasingly, in digital formats like PDF, ensuring its continued accessibility for generations․
The Author of the Hanuman Chalisa: Tulsidas
Tulsidas, born in 1532 in Rajapur, Uttar Pradesh, India, stands as one of the most revered poet-saints in Hindu tradition․ His life was deeply marked by devotion to Lord Rama, a theme that permeates his extensive literary works, most notably the Ramcharitmanas․ Before becoming a celebrated poet, Tulsidas experienced personal loss and a period of spiritual seeking․
He is believed to have been inspired by Hanuman’s unwavering loyalty and selfless service to Rama, which profoundly influenced his own spiritual path․ This devotion culminated in the creation of the Hanuman Chalisa, a hymn dedicated to praising Hanuman’s virtues and seeking his blessings․
Tulsidas wrote primarily in the Awadhi dialect, making his work accessible to the common people․ His compositions are characterized by their lyrical beauty, profound spiritual insights, and enduring cultural impact․ The widespread availability of the Hanuman Chalisa in PDF format today is a testament to Tulsidas’s lasting legacy․
Significance of Reciting the Hanuman Chalisa
Reciting the Hanuman Chalisa holds immense spiritual significance for devotees of Lord Rama and Hanuman․ It’s believed to invoke Hanuman’s divine presence, offering protection from negative energies and obstacles․ The 40 verses are a powerful expression of devotion, praising Hanuman’s strength, courage, wisdom, and unwavering loyalty․
Many believe regular recitation fosters inner peace, enhances concentration, and strengthens one’s connection with the divine․ It’s often recited during times of difficulty, seeking Hanuman’s assistance in overcoming challenges․ The Chalisa is considered a potent remedy for warding off evil influences and promoting overall well-being․
The accessibility of the Hanuman Chalisa in PDF format further amplifies its significance, allowing devotees worldwide to easily incorporate this sacred practice into their daily lives, regardless of location or circumstance․ It’s a readily available source of spiritual solace and empowerment․
Benefits of Regular Recitation
Consistent recitation of the Hanuman Chalisa is believed to yield numerous benefits for both the mind and spirit․ Devotees often experience increased mental clarity, improved focus, and a heightened sense of inner peace․ The Chalisa’s verses are thought to dispel negative thoughts and emotions, fostering a positive outlook on life․
Furthermore, regular practice is said to strengthen devotion to Lord Rama and Hanuman, deepening one’s spiritual connection․ Many believe it provides protection from harmful influences, removes obstacles, and accelerates progress on the spiritual path․ It’s considered a powerful tool for cultivating courage, self-confidence, and unwavering faith․
The convenience of accessing the Hanuman Chalisa in PDF format encourages consistent practice, making it easier to integrate this beneficial ritual into daily routines, leading to profound and lasting positive changes․
Hanuman: The Deity – A Brief Overview
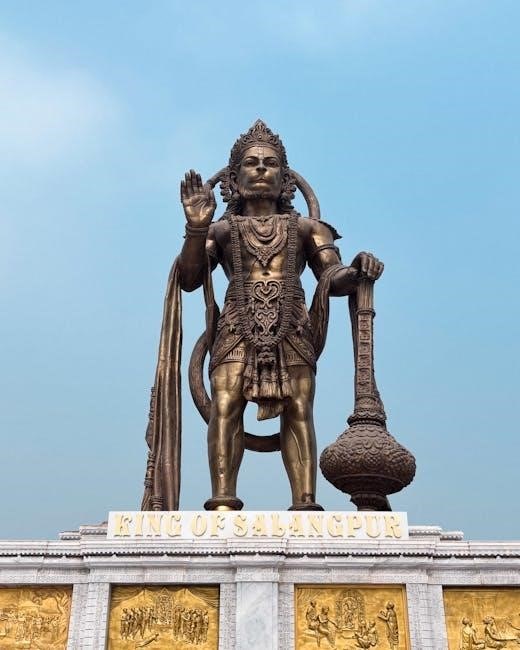
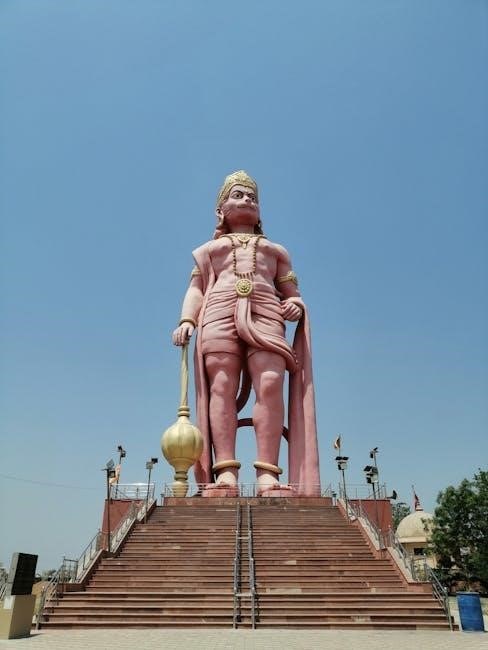
Hanuman, a central figure in Hindu mythology, is revered as a symbol of strength, devotion, and selfless service․ Often depicted as a mighty monkey god, he embodies unwavering loyalty to Lord Rama and is celebrated for his heroic deeds in the epic Ramayana․ His incredible strength allowed him to move mountains and cross oceans, demonstrating his extraordinary capabilities․
Beyond physical prowess, Hanuman represents the ideal bhakta – the devoted follower – showcasing unparalleled dedication and humility․ He is worshipped as a protector, a source of courage, and a remover of obstacles․ His image inspires countless devotees to cultivate similar virtues in their own lives․
Understanding Hanuman’s significance enhances the appreciation of the Hanuman Chalisa, a devotional hymn dedicated to this powerful deity, readily available in convenient PDF formats for widespread access and spiritual practice․
Hanuman’s Role in the Ramayana
Within the epic Ramayana, Hanuman plays a pivotal and indispensable role, serving as a devoted companion and unwavering ally to Lord Rama․ He is instrumental in Rama’s quest to rescue Sita from the clutches of the demon king Ravana, undertaking perilous journeys and demonstrating extraordinary courage․
Hanuman’s most celebrated feat is his leap across the ocean to Lanka, where he locates Sita and delivers Rama’s message of hope․ He also single-handedly sets Lanka ablaze, showcasing his immense power and strategic brilliance․ His loyalty extends beyond strength; he embodies selfless service and unwavering faith․
The profound impact of Hanuman’s actions within the Ramayana underscores the importance of devotion, as beautifully expressed in the Hanuman Chalisa, a hymn readily accessible in PDF format for devotees seeking spiritual connection․
Key Attributes of Hanuman

Hanuman is universally revered for a constellation of exceptional attributes, embodying strength, devotion, and selfless service․ His physical prowess is legendary, demonstrated by his ability to leap across vast oceans and lift immense mountains – feats celebrated in the Hanuman Chalisa, easily found in accessible PDF versions;
Beyond physical strength, Hanuman’s unwavering bhakti (devotion) to Lord Rama is his defining characteristic․ This devotion isn’t blind obedience, but a profound understanding and love, inspiring countless devotees․ He represents courage, humility, and unwavering loyalty, virtues that resonate deeply within Hindu culture․
Furthermore, Hanuman possesses exceptional intelligence and diplomatic skills, crucial in navigating complex situations during the Ramayana․ These qualities, along with his readily available Chalisa in PDF format, make him a timeless symbol of ideal character․

Finding the Hanuman Chalisa in PDF Format
Locate Hanuman Chalisa PDFs through reliable online sources, offering versions in English, Hindi, and Gujarati․ Download easily for personal use and devotional practice today!
Reliable Sources for PDF Downloads
Numerous websites provide free Hanuman Chalisa PDF downloads, but discerning reliable sources is crucial․ Several platforms consistently offer clean, accurate, and easily accessible versions of the Chalisa․ Look for websites associated with established Hindu organizations or temples, as they prioritize authenticity and devotional integrity․
Popular options include websites dedicated to Hindu scriptures and devotional content․ Many online religious bookstores also offer downloadable PDFs alongside physical copies․ Be cautious of sites with excessive advertising or unclear origins, as these may contain inaccurate or corrupted files․ Always scan downloaded files with antivirus software to ensure safety․

Furthermore, digital libraries and archives sometimes host scanned copies of traditional texts, including the Hanuman Chalisa․ Checking user reviews and comments can provide valuable insights into the quality and reliability of a particular download source․ Prioritizing reputable platforms guarantees a genuine and spiritually enriching experience with this powerful devotional hymn․
Hanuman Chalisa in English PDF
For English-speaking devotees, accessing the Hanuman Chalisa in PDF format is remarkably straightforward․ Numerous online resources offer downloadable versions, catering to diverse preferences regarding font size, layout, and transliteration schemes․ These PDFs typically include both the original Sanskrit verses alongside their English translations, facilitating comprehension and devotional practice․
Many websites provide options for downloading the Chalisa in various English transliterations – Devanagari script with Roman transliteration – aiding pronunciation for those unfamiliar with the original script․ Some PDFs also incorporate explanatory notes and commentaries, deepening understanding of the verses’ meaning and significance․
When searching, prioritize sources that offer clear, legible formatting and accurate translations․ Websites dedicated to Hindu scriptures and devotional literature are generally reliable․ Downloading from trusted platforms ensures a high-quality, spiritually enriching experience with this beloved hymn, allowing for easy recitation and contemplation․
Hanuman Chalisa in Hindi PDF
The Hanuman Chalisa originates in Hindi, making PDF versions in the original script widely available online․ These PDFs present the verses in Devanagari script, the traditional writing system for Sanskrit and Hindi, allowing for authentic recitation and a deeper connection to the text’s roots․ Numerous websites specialize in Hindu religious texts and offer free downloadable PDFs of the Chalisa․
These Hindi PDFs often feature clear, standardized formatting, ensuring readability and ease of use․ Some versions include vowel markings (matras) to aid pronunciation for those learning to read Devanagari․ Additionally, certain PDFs may incorporate brief explanations of key terms or verses, enhancing understanding of the Chalisa’s profound meaning․
When seeking a Hindi PDF, prioritize sources known for their accuracy and adherence to traditional scriptural standards․ Reputable websites dedicated to Hindu dharma and spirituality are excellent starting points for finding a reliable and authentic version of the Hanuman Chalisa․
Hanuman Chalisa in Gujarati PDF

For Gujarati-speaking devotees, Hanuman Chalisa PDFs translated into Gujarati offer a convenient way to connect with the devotional verses in their native language․ While Hindi is the origin, the Chalisa’s popularity has led to translations catering to diverse linguistic communities․ These Gujarati PDFs maintain the core essence of the original while adapting the language for regional accessibility․
Finding a reliable Gujarati PDF requires careful selection of sources․ Look for websites specializing in Gujarati literature or Hindu religious texts, ensuring the translation is accurate and respectful of the original meaning․ The Gujarati script used in these PDFs will differ from Devanagari, presenting the verses in a visually distinct format․
These PDFs often cater to the specific needs of Gujarati-speaking communities, potentially including transliterations or phonetic guides to aid pronunciation․ Prioritizing reputable sources guarantees a faithful and meaningful experience with the Hanuman Chalisa in Gujarati․
Other Language Versions Available in PDF
Beyond English, Hindi, and Gujarati, the Hanuman Chalisa’s universal appeal has spurred translations into numerous other languages, readily available in PDF format․ This reflects the widespread devotion to Lord Hanuman across diverse cultural boundaries․ While finding these versions may require more focused searching, the effort yields rewarding spiritual access․
Languages like Marathi, Tamil, Telugu, and Bengali frequently feature Hanuman Chalisa PDFs, catering to regional devotees․ The availability often depends on the size and activity of the local Hindu community․ Online platforms dedicated to religious texts or specific language communities are excellent starting points for your search․
When exploring these less common PDFs, verifying the translation’s accuracy is crucial․ Look for sources with established reputations or endorsements from respected religious figures․ Accessing the Chalisa in one’s native tongue deepens the devotional experience, fostering a stronger connection with Lord Hanuman’s blessings․
Understanding the Chalisa’s Structure
The Hanuman Chalisa comprises 40 verses, each a tribute to Hanuman’s virtues and exploits․ Translations offer varied interpretations, enriching understanding of this devotional poem’s profound spiritual message․
The 40 Verses: A Breakdown
Each of the forty verses within the Hanuman Chalisa meticulously details an aspect of Hanuman’s extraordinary life, unwavering devotion, and unparalleled strength․ The initial verses typically offer invocations and praise to Lord Shiva, followed by descriptions of Hanuman’s divine birth and early life․ Subsequent verses narrate his pivotal role in assisting Lord Rama, highlighting his courageous journey to Lanka, his unwavering loyalty, and his instrumental contribution to the victory over Ravana․
The verses progressively unfold Hanuman’s remarkable attributes – his immense physical power, his mastery of various scriptures, his selfless service, and his profound wisdom․ Many verses emphasize Hanuman’s humility and his complete surrender to Rama’s will․ The Chalisa doesn’t merely recount events; it delves into the emotional and spiritual depth of Hanuman’s character, portraying him as the epitome of devotion and a beacon of hope for all devotees․
Later verses often focus on the benefits of reciting the Chalisa, promising blessings of strength, courage, peace, and protection from negative energies․ The concluding verses express gratitude and seek Hanuman’s continued grace․ Understanding the narrative flow and thematic progression within these forty verses enhances the devotional experience and allows for a deeper connection with Hanuman’s divine essence․
Common Translations and Interpretations

Numerous translations of the Hanuman Chalisa exist, catering to diverse linguistic preferences and interpretive nuances․ While the original is in Awadhi, a dialect of Hindi, English translations are widely available in PDF format, facilitating accessibility for a global audience․ These translations vary in their literalness and poetic license, impacting the overall reading experience․
Interpretations often center around the devotional aspect, emphasizing Hanuman’s unwavering bhakti (devotion) towards Rama as the ultimate path to spiritual liberation․ Some interpretations focus on the symbolic meaning of Hanuman’s attributes – his strength representing inner resilience, his humility embodying selfless service, and his devotion signifying unwavering faith․
Scholars and devotees alike offer diverse perspectives, enriching the understanding of the Chalisa’s profound message․ Some view it as a powerful mantra for overcoming obstacles, while others see it as a guide for cultivating virtues like courage, discipline, and compassion․ The availability of multiple translations and interpretations allows individuals to connect with the Chalisa on a personal level, fostering a deeper and more meaningful devotional practice․
Hanuman-centric Movies and Cultural Impact
Hanuman’s enduring presence in Hindu mythology has profoundly impacted popular culture, particularly within Indian cinema․ While the Ramayana frequently features Hanuman, dedicated biopics have also emerged, notably the 1976 Hindi film starring Dara Singh, portraying Hanuman’s heroic feats and divine qualities․ This film cemented Hanuman’s image as a symbol of strength and righteousness․
The cultural impact extends beyond film, influencing television series, theatrical productions, and artistic representations․ Hanuman’s image is ubiquitous in homes and temples, symbolizing protection, devotion, and courage․ The widespread availability of the Hanuman Chalisa in PDF format further contributes to his accessibility and continued relevance․

Furthermore, the Chalisa itself has inspired numerous musical renditions and devotional performances, amplifying its cultural reach․ Hanuman’s story continues to resonate with audiences of all ages, reinforcing his position as a beloved deity and a powerful cultural icon, readily accessible through digital platforms and traditional practices․