The low-carb vegetarian diet combines the principles of reducing carbohydrate intake with plant-based eating, offering a balanced approach to weight loss and improved metabolic health․
What is a Low-Carb Vegetarian Diet?
A low-carb vegetarian diet focuses on reducing carbohydrate intake while emphasizing plant-based foods․ It combines vegetarian eating with low-carb principles, prioritizing vegetables, legumes, nuts, seeds, and healthy fats․ This diet avoids high-carb foods like grains, sugars, and starchy vegetables, adapting to various low-carb approaches like keto or moderate carb restriction․ It offers a balanced way to manage weight, improve metabolic health, and reduce reliance on processed foods, catering to individuals seeking a meat-free, low-carb lifestyle․
Benefits of a Low-Carb Vegetarian Lifestyle
A low-carb vegetarian lifestyle offers numerous health benefits, including weight loss, improved blood sugar control, and reduced risk of heart disease․ By focusing on whole, nutrient-dense foods, this diet helps eliminate cravings for processed carbs and promotes sustained energy levels․ It also supports gut health through high fiber intake from vegetables and legumes․ Many followers report improved mental clarity and reduced inflammation․ This approach is particularly beneficial for those managing diabetes or prediabetes, as it stabilizes blood sugar fluctuations․ Additionally, it encourages a reduction in refined and processed foods, fostering a healthier relationship with food overall․ The diet’s flexibility allows for customization to meet individual health goals while maintaining a balanced and satisfying eating pattern;
Key Principles of the Diet
The low-carb vegetarian diet emphasizes reducing carbohydrate intake while focusing on plant-based foods․ It prioritizes whole, unprocessed foods like vegetables, nuts, seeds, and healthy fats․ Grains, starchy vegetables, and high-sugar fruits are minimized․ Protein sources include legumes, eggs, and dairy, while avoiding meat․ The diet encourages mindful portion control and balancing macronutrients to maintain satisfaction and energy․ By eliminating refined sugars and focusing on natural flavors, it promotes a healthier metabolic state․ This approach aligns with sustainable eating habits, supporting long-term health and weight management without deprivation, making it a flexible and adaptable choice for those pursuing a balanced lifestyle․

Understanding the Basics
The low-carb vegetarian diet focuses on reducing carbohydrate intake while emphasizing plant-based foods, ensuring a balanced approach to nutrition and health through mindful food choices․
Foods to Eat and Avoid
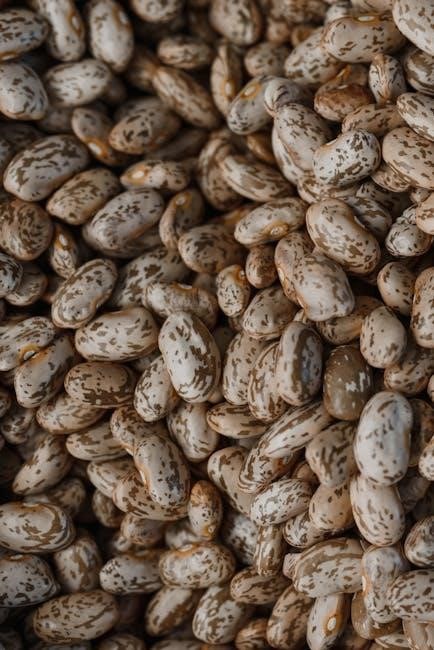
Focusing on whole, nutrient-dense foods is key to a low-carb vegetarian diet․ Emphasize vegetables like leafy greens, broccoli, and cauliflower, along with avocados, nuts, seeds, and healthy fats like olive oil․ Eggs and full-fat dairy products are also great protein sources․ Avoid high-carb foods such as grains, legumes, starchy vegetables like potatoes, and sugary snacks․ Processed foods should be minimized to ensure optimal nutrition and weight management․ By prioritizing these foods, you can maintain a balanced and satisfying low-carb vegetarian lifestyle․
Understanding Carbohydrate Counting
Carbohydrate counting is a straightforward method to track carb intake, essential for managing blood sugar and weight․ It involves categorizing foods into low, moderate, and high-carb options․ Low-carb foods include leafy greens, broccoli, and avocado, while high-carb foods like grains and legumes are limited․ Aim for a daily intake of 50-150 grams of carbs, depending on your goals․ Reading food labels and using carb-counting tools or apps can help you stay on track․ Over time, you’ll learn portion sizes and adjust your choices accordingly․ Consistent carb counting ensures you meet your dietary goals safely and effectively, supporting a balanced low-carb vegetarian lifestyle․
Importance of Protein and Healthy Fats
Protein and healthy fats are crucial in a low-carb vegetarian diet for satiety, energy, and maintaining muscle mass․ Include plant-based proteins like legumes, tofu, and tempeh, while healthy fats from avocados, nuts, and olive oil support heart health and digestion․ These nutrients also help stabilize blood sugar levels, reducing cravings․ Aim to incorporate a variety of these foods in each meal to ensure a balanced intake․ Properly combining protein and fats with vegetables not only enhances meal satisfaction but also supports overall nutritional needs, making the diet sustainable and effective for long-term health goals and weight management․

Sample 7-Day Meal Plan
This meal plan offers a variety of delicious, low-carb vegetarian dishes, ensuring balanced nutrition and flavor throughout the week with easy-to-follow recipes and grocery lists․
Breakfast Ideas
Start your day with protein-rich, low-carb vegetarian breakfasts․ Options include scrambled eggs with spinach and avocado, Greek yogurt topped with berries and chia seeds, or a veggie omelet with zucchini and mushrooms․ Tofu scramble with turmeric and bell peppers is another tasty choice․ Smoothies made with almond milk, spinach, and almond butter are quick and nutritious․ For a hearty option, try cauliflower pancakes or a low-carb veggie hash with sweet potatoes and kale․ These meals are designed to keep you full and energized while staying within your carb limit․ Incorporate healthy fats like olive oil and avocado for added flavor and satisfaction․
Lunch and Dinner Options
For satisfying lunches and dinners, focus on vegetable-rich, protein-packed dishes․ Salads with mixed greens, cherry tomatoes, avocado, and a tofu or legume topping are ideal․ Stir-fries with broccoli, bell peppers, and mushrooms, cooked in olive oil or coconut oil, are flavorful and filling․ Veggie-packed curries with cauliflower rice or zucchini noodles make for hearty meals․ Lentil or vegetable soups are great for a light dinner․ Grilled or roasted vegetable skewers with hummus or guacamole dip are also excellent choices․ These meals are balanced, nutrient-dense, and keep you within your low-carb goals while offering variety and delicious flavors․
Snack Choices and Desserts
Snacking on low-carb, vegetarian options can be both satisfying and nutritious․ Reach for raw or roasted vegetables like cucumbers, bell peppers, and cauliflower, paired with dips like hummus or guacamole․ Nuts and seeds, such as almonds, walnuts, chia, and flax, are excellent choices but should be enjoyed in moderation due to their calorie density․ For desserts, opt for berries with a dollop of full-fat Greek yogurt or a small portion of dark chocolate (at least 85% cocoa)․ Keto-friendly desserts like chia pudding or low-carb fruit crisps can also satisfy sweet cravings without breaking your dietary goals․ Always prioritize portion control to maintain balance․
Tips for Success
Plan meals in advance, stock up on essentials, and stay hydrated․ Track carbs, listen to your body, and seek support to stay motivated and consistent․
Meal Prepping and Planning
Meal prepping and planning are essential for maintaining a low-carb vegetarian diet․ Start by creating a weekly meal schedule and shopping list to ensure you have all necessary ingredients․ Prepare ingredients like chopped vegetables, cooked legumes, and healthy fats in advance to save time․ Portion control is key, so use containers to pre-pack meals for convenience․ Stick to your plan but allow flexibility for adjustments based on preferences or availability․ Regularly review and update your meal plan to keep things interesting and tailored to your goals․ This structured approach helps reduce food waste and keeps you on track with your dietary objectives․
Shopping List Essentials

A well-stocked shopping list is crucial for a low-carb vegetarian diet․ Focus on fresh vegetables like leafy greens, broccoli, cauliflower, and bell peppers․ Include healthy fats such as avocados, olive oil, nuts, and seeds․ Protein sources like tofu, tempeh, eggs, and legumes are must-haves․ Low-carb alternatives to grains, such as zucchini noodles or shirataki, can be added․ Don’t forget herbs, spices, and condiments to enhance flavor without added carbs․ Incorporate fermented foods like kimchi or sauerkraut for gut health․ Always opt for whole, unprocessed foods and check labels to avoid hidden carbs․ A organized shopping list ensures you stay aligned with your dietary goals and avoids last-minute unhealthy choices․
Common Challenges and Solutions
Adapting to a low-carb vegetarian diet can present challenges, such as protein deficiency or carb cravings․ To combat this, incorporate plant-based proteins like tofu, tempeh, and legumes․ Cravings can be managed by substituting high-carb foods with low-carb alternatives like zucchini noodles or cauliflower rice․ Meal planning is crucial to avoid monotony; experiment with new recipes and flavors to keep meals exciting․ Additionally, ensuring nutrient balance is key; consider consulting a nutritionist or using a meal plan to guide your choices․ Staying hydrated and mindful of portion sizes also helps maintain adherence to the diet․ Consistency and creativity are essential for long-term success․

Health Considerations
A low-carb vegetarian diet emphasizes whole, nutrient-rich foods, promoting better blood sugar control and heart health․ It reduces inflammation and supports sustainable weight management when planned properly․
Nutrient Balance and Deficiencies
A low-carb vegetarian diet requires careful attention to nutrient balance to avoid deficiencies․ Protein sources like legumes, tofu, and eggs are essential, while healthy fats from avocados and nuts support energy needs․ Vitamin B12, iron, and omega-3 fatty acids may be lacking, so supplements or fortified foods are recommended․ Fiber intake should be maintained through low-carb vegetables and seeds to support digestion․ Calcium and vitamin D can be obtained from dairy or plant-based alternatives․ Regular blood tests and consultations with a healthcare professional are advised to ensure proper nutrient levels and address any potential deficiencies early on․
Weight Loss and Maintenance
The low-carb vegetarian diet is effective for weight loss due to its focus on reducing carbohydrate intake, which helps lower insulin levels and promote fat burning․ By emphasizing protein-rich foods like legumes and tofu, it supports satiety and muscle preservation․ Incorporating healthy fats from avocados and nuts provides sustained energy․ Portion control and mindful eating are key to maintaining weight loss․ Regular physical activity complements the diet, enhancing metabolism and overall health; Over time, the diet’s balanced approach helps transition into a maintenance phase, where whole, nutrient-dense foods continue to promote a healthy weight and improved well-being․
Consulting a Healthcare Professional
Before starting a low-carb vegetarian diet, it’s crucial to consult a healthcare professional, especially for those with pre-existing health conditions like diabetes or heart disease․ A doctor or nutritionist can help tailor the diet to individual needs, ensuring proper nutrient intake and addressing potential deficiencies․ They can also monitor health markers and provide guidance on managing any adverse effects․ Additionally, a healthcare provider can offer support in maintaining long-term adherence to the diet, making adjustments as necessary to achieve and sustain health goals safely and effectively․